Wednesday, April 1, 2009

Stuffed Peppers

It has been a LOOOONG time since I've updated. I've actually been busy working on launching a new site to show off my cakes & cookies. Check it out at www.centerstagesweets.com. However, eating all those sweets has helped me pack on some pounds, so it's definitely time to start making some healthy recipes again!

Stuffed peppers have always been one of my favorite meals, and using low fat ground beef and brown rice makes it a great healthy meal. I used a combination of about 5 recipes to come up with this one, and it was great! I loved the little kick of spice the tobacsco sauce adds to the topping. Enjoy!


Stuffed Peppers

Ingredients:

  • 4 green or red bell peppers
  • 1 lb lean ground beef
  • 1 onion
  • 2 cloves garlic
  • 1 can diced tomatoes (undrained)
  • 1 ½ cups cooked brown rice
  • ½ cup ketchup
  • ½ teaspoon Worcestershire sauce
  • Dash of tabasco sauce

Directions:

  • Bring a large pot of salted water to a boil.
  • Slice peppers in half lengthwise and remove seeds & stems. Boil peppers 5 minutes to soften. Remove from water and set aside.
  • Preheat oven to 350 degrees
  • Sautee beef, onions and garlic in a large frying pan until beef is browned. Drain excess fat.
  • Season beef mixture with salt and pepper, then add diced tomatoes and cooked rice.
  • Place peppers open side up in a baking dish and stuff with meat and rice mixture.
  • Bake peppers for 25-30 minutes.

Friday, December 26, 2008

Roasted Red Pepper Risotto

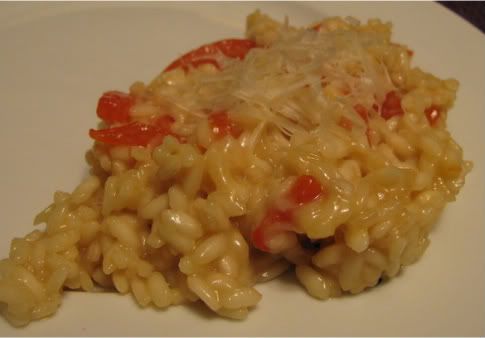
Watching Hell's Kitchen has inspired me to want to try risotto. I was hopeful that Gordon Ramsey wouldn't show up in my kitchen screaming, "YOU'RE SWEATING IN THE RISOTTO! IT'S SAAAWLTY!" Luckily, all went well for my first risotto, it was much easier than I expected. I did make the mistake of using regular chicken broth instead of low sodium, so the finished product turned out a little more salty than I would have liked. But I assure you, it had nothing to do with sweat and everything to do with salty broth. However, it did result in me doing some giggling and a Ramsey IT'S SAAAAAWLTY! impression during Christmas dinner.


Roasted Red Pepper Risotto

Source: foodfit.com

Ingredients:

  • about 3 cups of chicken stock or low-sodium chicken broth (I heated about 4 cups and used most of it)
  • 2 teaspoons olive oil
  • 1/3 cup diced onions
  • 1 teaspoon minced garlic
  • 1 cup Arborio rice
  • 1/2 cup freshly grated Parmesan cheese
  • salt to taste
  • freshly ground black pepper
  • 1 roasted red pepper

Directions:

  • Heat the stock in a saucepan and keep hot over low heat.
  • Heat the olive oil over medium heat in a separate medium-sized pot. Add the onion and cook until it turns translucent, about 5 minutes. Add the garlic and cook 1 minute more.
  • Add the rice to the onion mixture, stir and turn the heat to low. Add about 1 cup of the hot stock to the rice mixture, and stir slowly until the stock is absorbed.
  • Continue to add the stock 1 cup at a time, stirring slowly, letting the rice absorb the stock before adding more.
  • The risotto is cooked when it is creamy on the outside and slightly firm (al dente) in the center, about 20 to 25 minutes in all. Stir in half of the Parmesan cheese and half of the red pepper strips. Season with salt and pepper to taste. If the risotto is too thick, add a little more stock until it becomes creamy.
  • Divide the risotto into serving dishes and sprinkle with the remaining cheese and red pepper strips.

Jalapeno Popper Dip

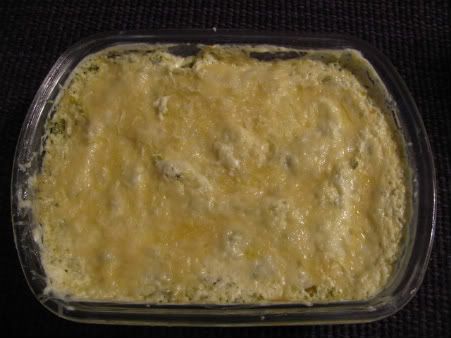
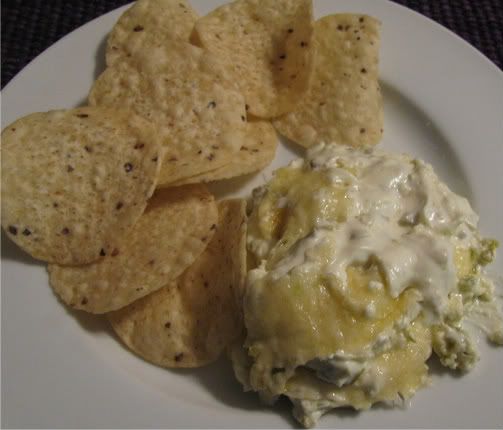
PLEASE don't judge this dip based soley on it's looks! This boring, blah looking little dip packs some serious flavor. I was looking for a last minute appetizer for Christmas, and this one was listed on allrecipes.com as one of the top 20 appetizers. It had 663 reviews and a 5 star rating. My husband loves anything jalapeno, so it was an easy choice. I knew my husband would like it, but I was surprised how much I loved it. I'm pretty sure I ate most of it myself. Apparently I want to see how much weight I can possibly gain over the holidays. Anyway, forget about the calories for a day and enjoy!


Jalapeno Popper Dip
Source: allrecipes.com

Ingredients:

  • 2 (8 ounce) packages cream cheese, softened
  • 1 cup mayonnaise
  • 1 (4 ounce) can chopped green chilies, drained
  • 2 ounces canned diced jalapeno peppers, drained (I used most of the 6 ounce can and did not think the dip was too spicy)
  • 1 cup grated Parmesan cheese

Directions:

  • Stir together cream cheese and mayonnaise in a large bowl until smooth. Stir in green chiles and jalapeno peppers. Pour mixture into a microwave safe serving dish, and sprinkle with Parmesan cheese.
  • Microwave on High until hot, about 3 minutes. (you can also bake it in the oven to brown the cheese - bake at 375 degrees for about 30 minutes).


Christmas cut out cookies!

Decorating sugar cookies is definitely my new favorite hobby. For recipes and instructions, see my cookie bouquet post. I'm going to plan on getting an earlier start next year so I have time to make more designs. Here are my Christmas trees - my first few were kind of ugly until I got a little better at the swirls:


And my snowflakes! I'm really proud of these. I outlined them and flooded with blue icing then let them dry. The next morning I piped the design on in white, and dipped the cooking into sanding sugar while the icing was still wet. Perfectly sparkley!


Cherry Shortbread Cookies

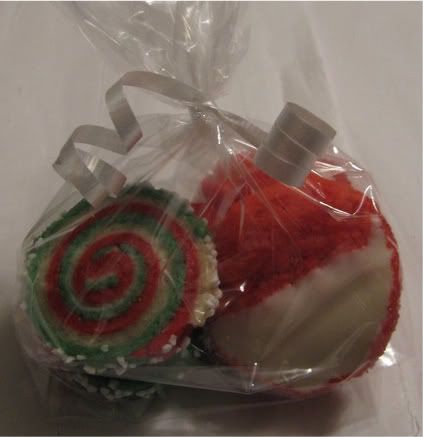
Another one of my favorite Christmas cookies! This is another recipe that was passed down to me from my wonderful aunt. Although I only made red ones this year, you can also use green maraschino cherries and green food coloring, and dip them into milk chocolate.

Cherry Shortbread Cookies

Ingredients:

  • ½ cup chopped, drained maraschino cherries (put on paper towels to drain after chopping)
  • 1 ¼ cup flour
  • ½ cup butter
  • 3 tablespoons sugar
  • ½ tablespoon mlk
  • ½ tablespoon almond extract
  • food coloring
  • 1 bag of white chocolate chips

Directions:

  • Preheat oven to 325 degrees
  • Stir together flour and sugar
  • Cut in butter using a stand mixer or pastry blender until dough resembles fine crumbs
  • Stir in cherries, milk, food coloring, and almond extract
  • Form dough into a ball, knead until smooth
  • Roll dough into 1" balls, use the bottom of a glass to flatten them (I put a small piece of parchment paper on top of the dough first, so the dough does not stick to the glass)
  • Bake for 20 minutes until the cookies are firm and light brown on the bottom
  • Let cookies cool competely
  • Melt white chocolate chips in microwave
  • Dip half of each cookie into white chocolate, place on parchment paper to dry

Thursday, December 25, 2008

Pinwheel cookies

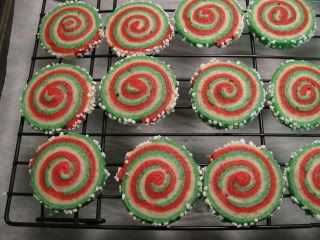
Every year when I make these cookies, I swear that I'm never going to make them again. Then I think about how pretty they are and how nice they look on a cookie tray, and I cave. These are very labor intense - it involves rolling out 9 pieces of dough almost paper thin, but I think it's worth it! The dough is a shortbread dough, so it's not overly sweet, and the cookies taste great with coffee or hot cocoa.

Pinwheel Cookies
Original Source: Unknown, my aunt gave me the recipe

Ingredients: (you will need to make 3 separate batches, so when you are gathering ingredients, keep in mind that you will need 3 times the amounts listed below):

  • 1 ¼ cup flour
  • ½ cup butter
  • ½ tablespoon almond extract
  • 3 tablespoons sugar
  • ½ tablespoon milk
  • food coloring (red and green)
  • pearl sugar

Directions:

  • Preheat oven to 375 degrees
  • Stir together flour and sugar
  • Cut in butter using either a stand mixer or pastry blender
  • Stir in milk, almond extract and food coloring
  • Form dough into a ball and knead until smooth (the dough is dry, it will take some work to incorporate all the ingredients into a smooth dough)
  • Make 3 batches - red, green and white
  • Chill dough 1 hour
  • Separate each color of dough into 3rds for a total of 9 balls of dough
  • Roll each ball of dough into an 8x10 sheet on wax paper
  • Chill sheets of dough until firm
  • Layer one sheet of each color, brushing lightly with milk in between layers
  • Roll jellyroll style from the 10" end, rolling as tightly as possible
  • Chill logs until firm (I put them in the freezer for about 30 minutes)
  • Brush logs with beaten egg white, then roll in pearl sugar
  • Slice the logs into ¼" slices
  • Bake on parchment paper for 10 minutes

Oreo bark

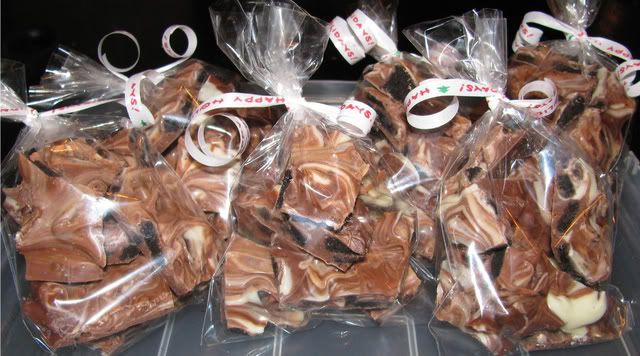
A coworker of mine gave me a little tin of this stuff last Christmas, and I was hooked. It is SO good, and I'll warn you, pretty addictive. An added bonus is that it is a cinch to make, but looks pretty impressive.


Oreo Bark

Ingredients:
  • 12 oz. milk chocolate (I use Ghirardelli chips)
  • 6 oz. white chocolate
  • 15 Oreos

Directions:

  • Put the oreos into a large ziploc bag and crush them until they are in small, bite-sized pieces.
  • Melt the milk chocolate in a double boiler.
  • When chocolate is melted and smooth, carefully stir in Oreo pieces.
  • Spread the mixture onto a foil covered cookie sheet, trying to keep the cookies in an even layer.
  • Melt white chocolate in microwave and drizzle it on top. Use a knife to swirl.
  • Let cool & harden (I put the tray in the refrigerator to speed things up). Break into bite sized pieces.

Thursday, October 30, 2008

Wilton Fondant & Gumpaste - Final Cake!

I'm so sad that my fondant & gumpaste class is over! I definitely need to learn how to make some more gumpaste flowers. My instructor offered me some private lessons, so I may need to take her up on it. She also took some pictures of my final cake and told me that I was going to have a great career! So if any of you out there need a cake, cupcakes or some cookies, I'm your girl!


I LOVE all of the teeny tiny daisies spilling onto the cake
Hey, can we eat this thing yet?


Gumpaste Flowers

Here are some of the gumpaste flowers we've made in class! I think that the carnation is my favorite - it's crazy how real they look!

Calla Lillies:
Carnations:


Daisies:


Baby Shower Cake, Cupcakes, and Cookies!

I got the chance to make a cake for my first "real" occassion - my friend Mara's baby shower! But I couldn't just stop at a cake. I ended up making the cake, 3 kinds of cupcakes and some sugar cookies. I'm really happy with the way everything turned out, and I'm looking forward to making more cakes! Here is the total setup! (I made the cake stand also).

And here is a close-up of the cake:

Cupcakes! I made 3 kinds: vanilla with lemon curd filling and lemon cream cheese frosting (yellow), apple crisp with whipped cream frosting (blue) and strawberry with strawberry cream cheese frosting (pink). They all tasted awesome!


And the whole thing was surrounded by my army of fuzzy baby chicken cookies!


Fuzzy Baby Chick Cookies!

My friend Mara is having a baby! (Congratulations Mara!) She graciously allowed me to practice my new cake & cookie decorating skills for her shower, and gave me total creative freedom! I didn't have much to work with, since the gender of the baby is a surprise, and there wasn't really a theme for the shower.

I've always had a weird fascination with tiny fuzzy baby chicks, so that became my inspiration. I used the same cookie recipe and icing recipe that I used on the cookie bouquets. I added some sanding sugar while the royal icing was still wet to make them "fuzzy."

I loved my army of fuzzy baby chicks. I giggled uncontrollably when I had them all stacked in the box and ready to go.

I present to you, my fuzzy baby chick army:


Wilton Fondant & Gumpaste - class 1

I have been a terrible, terrible blogger. Please forgive me. I offer you cake. Lots and lots of cake. I've been taking the Wilton fondant & gumpaste course and I love it! I wasn't sure I would like fondant, since I've heard such bad things about how it tastes, but it is SO much fun to work with. Here is my first fondant cake!


We learned how to make a "handkerchief" for our cakes. Because apparently they need one?


We also had to make a drape. I hated the drape. My cake does NOT need a scarf. Oh well, at least I know how to do it.


PS - the cake tasted phenominal! It was a white cake with raspberry and raspberry mousse fillings. SO good. The only picture I got of the inside was super blurry though, so there will be no making your mouth water today.

Wednesday, September 24, 2008

Crockpot Chili

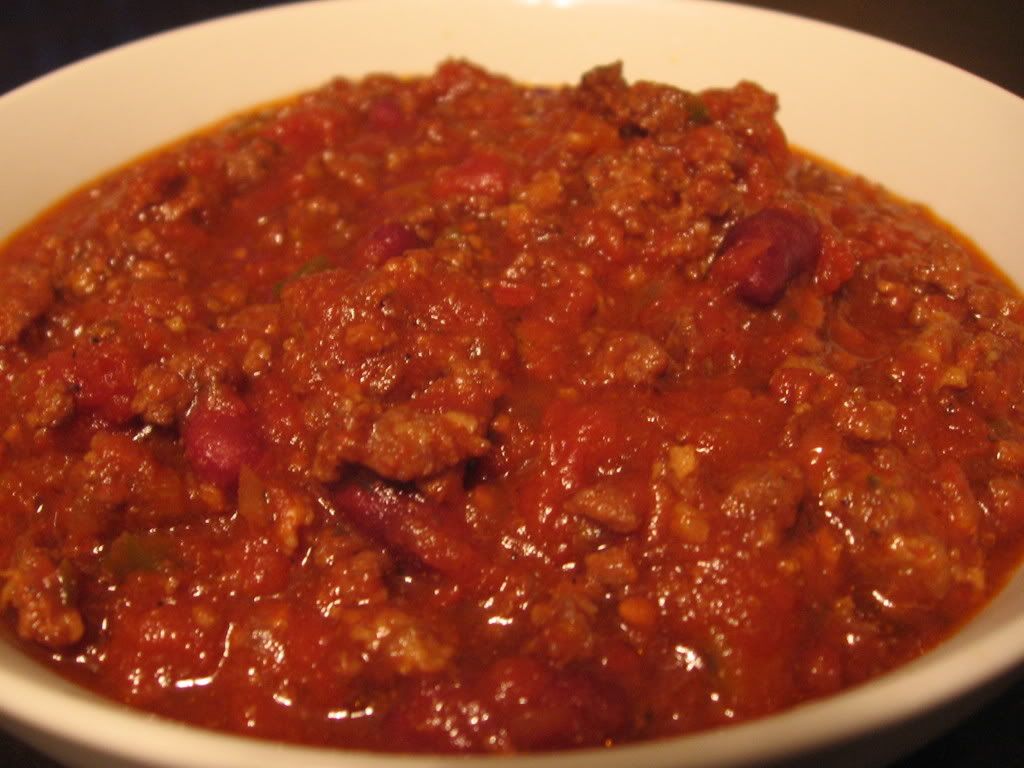
Chili is definitely one of my favorite fall foods. I make mine in the crockpot, so it is really easy and ready to eat when we get home from work. I used to use 2 lbs of ground beef, but recently have been using 1 lb of beef and 1 lb of spicy Italian sausage to give it an extra kick. The picture below probably looks extra meaty, and that is because I only had 1 can of beans. Ooops. The chili was still great anyway.

I usually put the chili together the night before, and leave it in the crock pot bowl in the refrigerator overnight, then just put it on to cook in the morning before work. So easy!


Crockpot Chili

Ingredients:
  • 2 pounds ground beef (or 1 pound beef + 1 pound hot Italian sausage)
  • 2 (16 ounce) cans light kidney beans
  • 1 (28 ounce) can crushed tomatoes
  • 1 can diced tomatoes with chilies or jalepenos
  • 2 small onions, chopped
  • 1 green pepper, chopped
  • 2 cloves garlic, minced
  • 1 teaspoon pepper
  • 3 teaspoons chili powder
  • 1 teaspoon cumin
Directions:
  • Brown ground beef, drain fat
  • Stir all ingredients in crock pot
  • Cook on low 10 hours

Banoffee Cupcakes

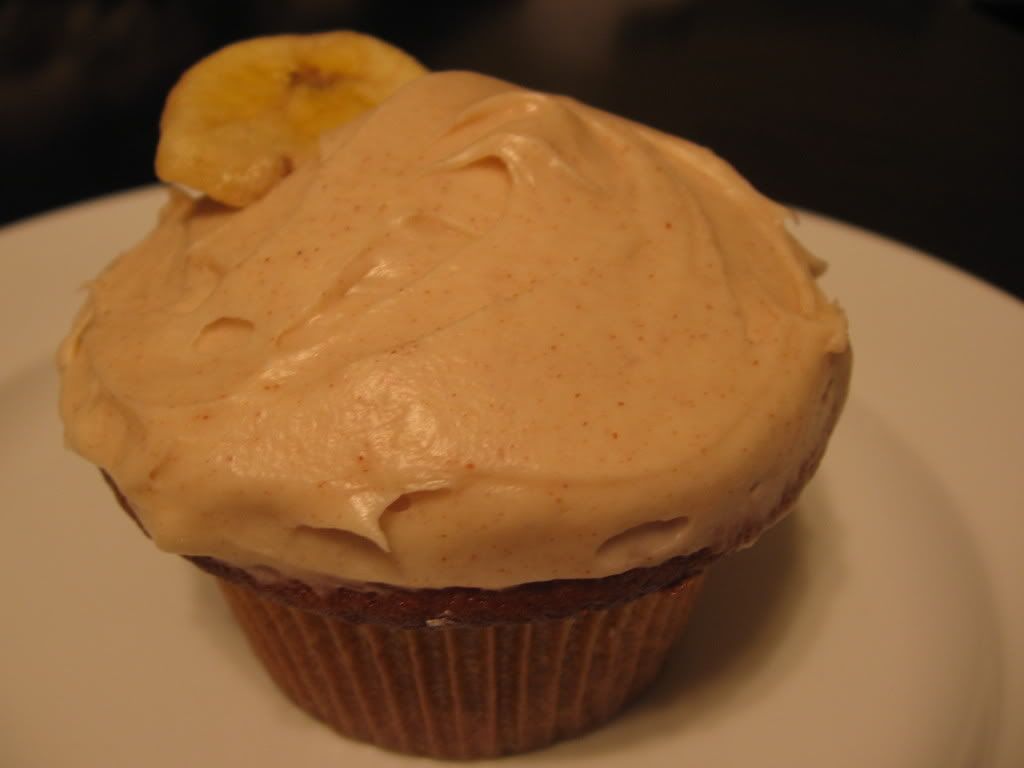
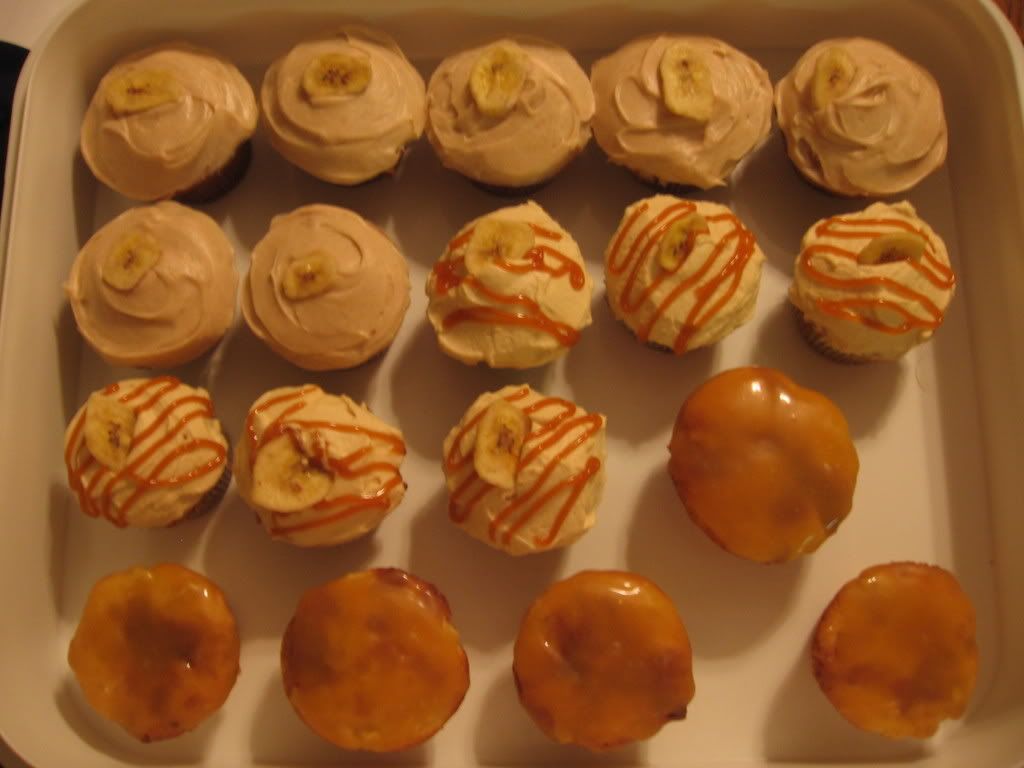
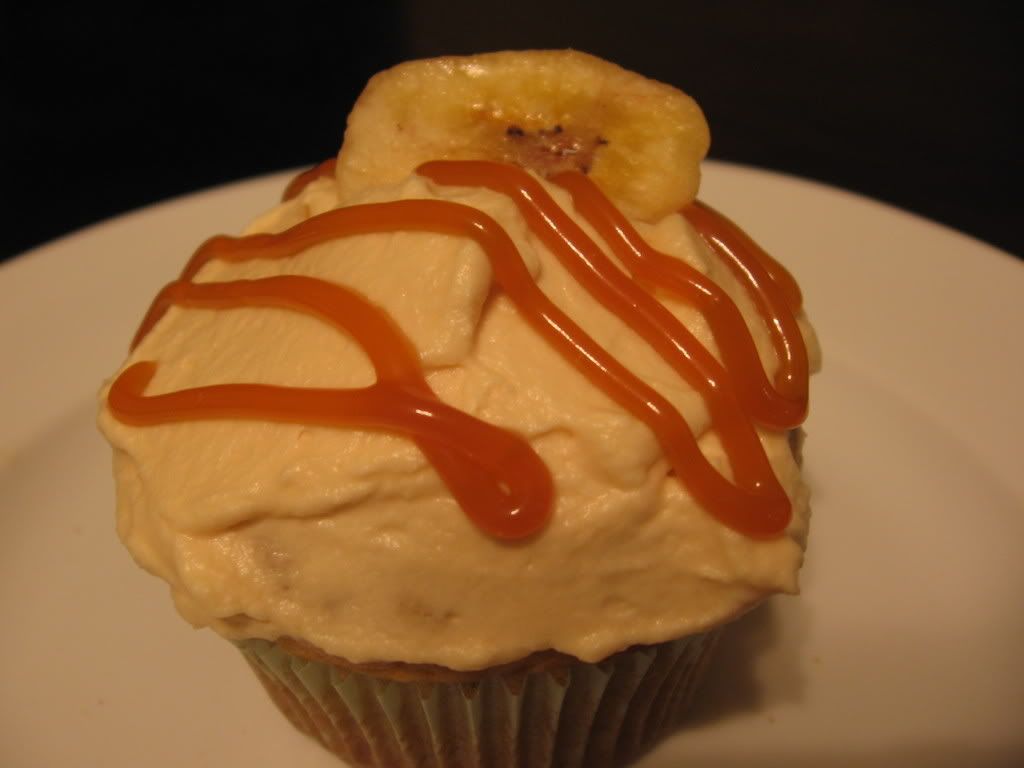
I've been following this great blog called How to Eat a Cupcake. Every week, Cassie posts a poll, allowing her readers to vote on her next cupcake. I voted for the banoffee cupcakes (even though I had never heard of banoffee, I knew the combination of bananas and caramel could not be bad) and crossed my fingers that they would win, and much to my shagrin, they did! There are no words to describe how delicious these cupcakes are. And the frosting? Holy crap. I could eat it by the bucket full (I followed her suggestion of using the caramel apple dip to sweeten the whipping cream). The original recipe is from Cupcake Heaven, by Susannah Blake, a book which is now on my Amazon wish list.

Make these cupcakes. Now.


Banoffee Cupcakes

Original Source: Cupcake Heaven, by Susannah Blake

Brought to you by Cassie at How to Eat a Cupcake

Yield: The original recipe says 10, Cassie got 8, and I got 5 large cupcakes.

Ingredients:

  • 4 tablespoons unsalted butter, at room temperature
  • 1/3 cup packed brown sugar
  • 1 egg, beaten
  • 1 ripe banana, mashed
  • 1 cup self-rising flour
  • 4 chewy caramels, chopped
  • Heath bits to sprinkle on top

Ingredients for Frosting:

  • 2/3 cup heavy cream, whipped
  • 3-4 tablespoons dulce de leche or caramel sauce

Directions:

  • Preheat the oven to 350°F.
  • Beat the butter and sugar together in a bowl until creamy, then beat in the egg, a little at a time. Fold in the mashed banana, then sift the flour into the mixture and fold in, followed by the caramels (I took Cassie's suggestion and tossed the caramels in the flour first to keep them from sticking together).
  • Spoon the mixture into the paper liners. Sprinkle the top of each cupcake with Heath bar pieces, and bake in the preheated oven for about 16 minutes until risen and a skewer inserted in the center comes out clean. Transfer to a wire rack to cool.
  • To decorate, swirl the cream over each of the cupcakes, then drizzle with a spoonful of dulce de leche or caramel sauce and top with slices of banana. (This was not included in the directions, but I beat the heavy cream in my mixer until it reached the consistency of whipped cream, then followed Cassie's suggestion of beating in the caramel apple dip to sweeten. I also topped mine with banana chips so I didn't have to worry about soggy brown bananas).

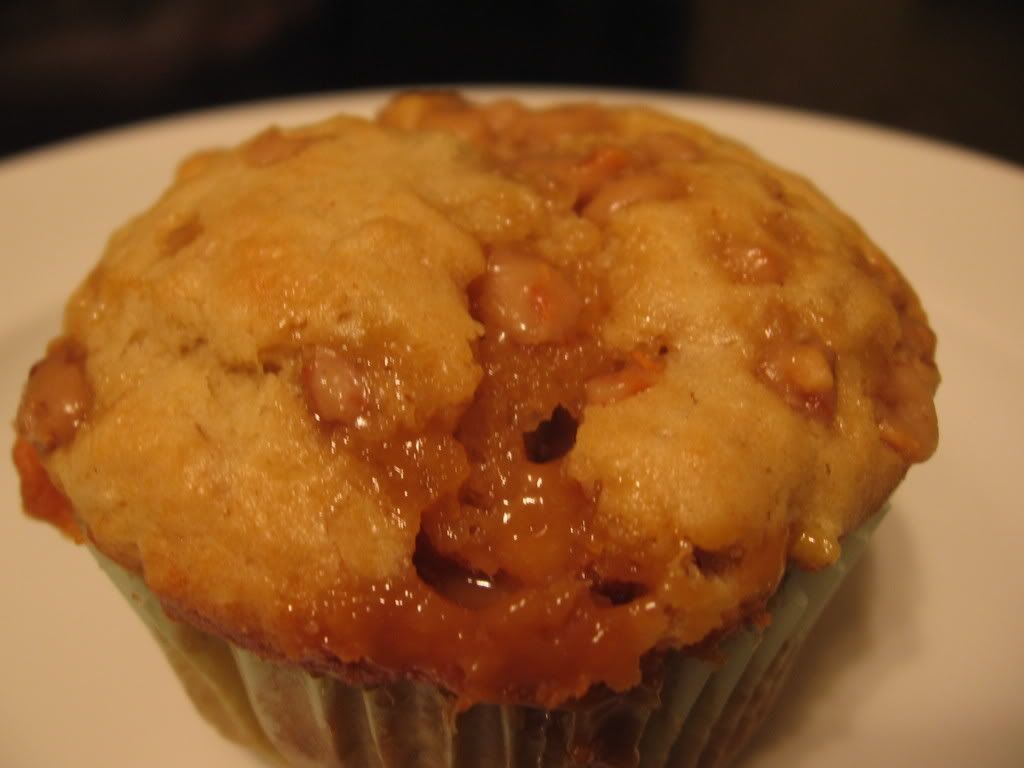
This is what they looked like after baking! Mmmmm.

Bananas Foster Cupcakes

Oh. My. God. Seriously. These are SO good. Bananas foster is one of my favorite desserts, and about a month ago I had the idea of turning it into a cupcake. I googled and googled and googled, but couldn't find much, and I wasn't happy with the recipes I did find. Finally, I stumbled across this recipe on recipezaar. I knew it had to be good since it actually involved making bananas foster and mixing it into the batter. These were really moist and the flavor was AMAZING. Enjoy!


Bananas Foster Cupcakes

Source: recipezaar

Yield: 16 cupcakes

Ingredients for Banana Mixture:

  • ¾ cup unsalted butter
  • ½ cup packed brown sugar
  • ½ teaspoon cinnamon
  • 2 ripe but still firm bananas, quartered (halved crosswise, then lengthwise)
  • 2 tablespoons dark rum
  • ½ teaspoon vanilla extract

Ingredients for Batter:

  • 2 ½ cups all-purpose flour
  • 1 teaspoon baking soda
  • 1/4 teaspoon salt
  • ¾ cup butter, softened
  • 1 ½ cups granulated sugar
  • 3 eggs
  • 1 teaspoon vanilla extract
  • ½ teaspoon dark rum
  • ¾ cup sour cream

Ingredients for Frosting:

  • 8 ounces cream cheese, softened
  • 1 teaspoon ground cinnamon
  • 3 cups powdered sugar, sifted
  • ½ cup butter, softened
  • ¾ teaspoon vanilla

Directions:

  • Preheat oven to 350 degrees.
  • For the banana mixture: In a saute pan over medium heat, combine the butter, brown sugar, and cinnamon. Cook until butter melts and sugar is dissolved (4 to 5 minutes). Add the banana slices and cook until tender, turning once for 1 to 2 minutes per side. Stir together rum and vanilla. Turn off the burner and add the rum mixture to the pan. Using a long match, light the alcohol by placing the flame just in the outer edge of the pan. Stand as far back as possible. FLAMBE! (this is the fun part.) The flame should extingish in a few seconds. Gently shake the pan from side to side to coat the bananas with the sauce. Spoon the bananas into a bowl and set aside.
  • For the cupcakes: In a large bowl, cream butter and sugar with electric mixer until light and fluffy. In a medium bowl, combine the flour, baking soda, and salt. Add eggs, vanilla, rum and banana mixture. Mix well. Add flour mixture alternately with sour cream; blend thoroughly but do not overmix. Pour into prepared cupcake pans.
  • Bake 20 - 25 minutes or until toothpick inserted comes out clean. Cool for 1- minutes in pan on rack. Remove and cool completely before frosting.
  • For the frosting: Beat together cream cheese, butter, cinnamon and vanilla on medium speed until light and fluffy. Add about half the powdered sugar and beat until mixed well. Then gradually add the remaining powdered sugar until you reach a spreading consistency (I didn't use all of it, I'd say there was about 1/3 cup leftover).

Apple Crisp Cupcakes

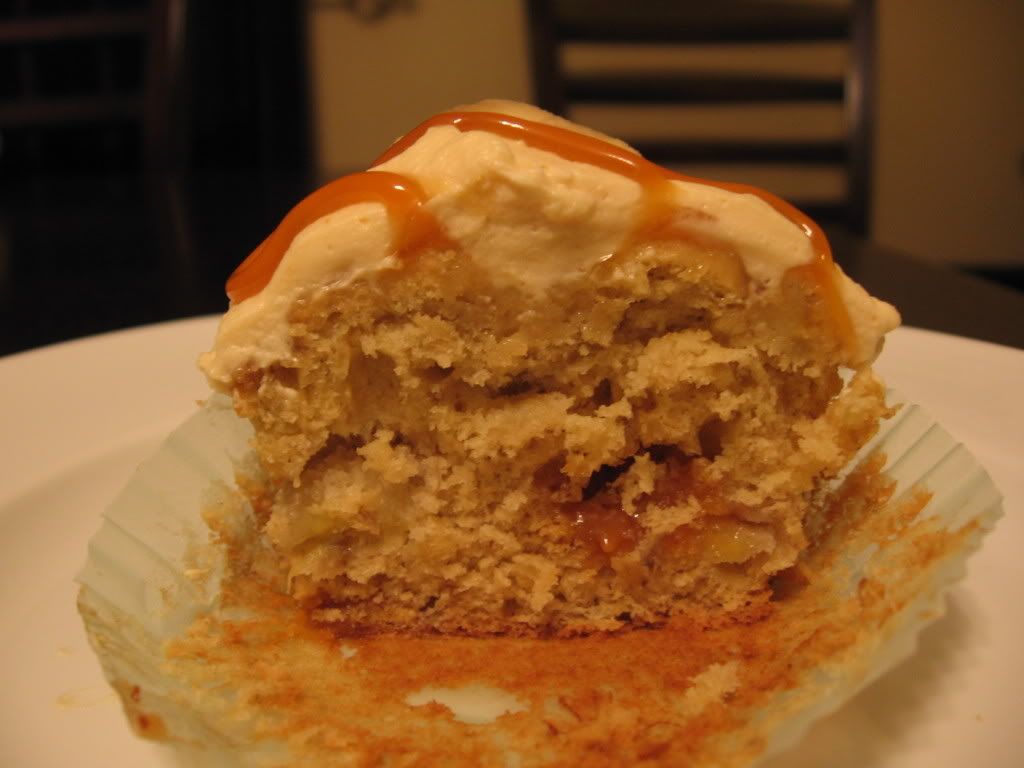
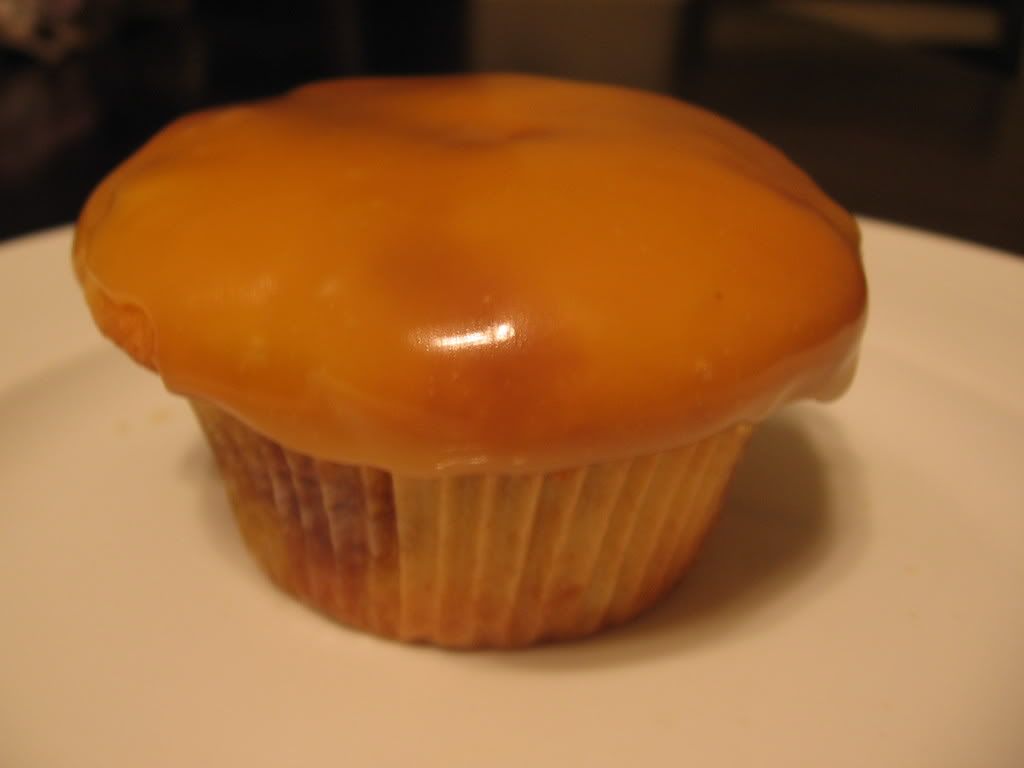
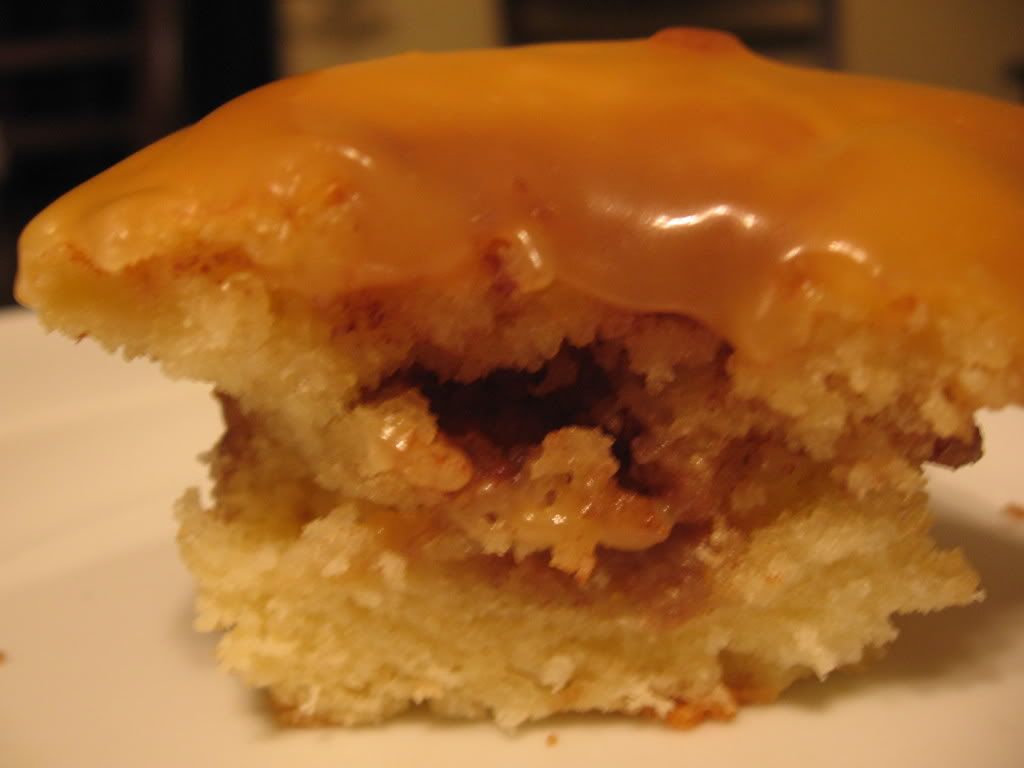
I've been in a fall food kind of mood. When I saw this cupcake recipe, I knew that I had to make them mine, and I was not disappointed. They were really moist, and I loved the streusel in the middle. I actually had a bunch of streusel left over so I sprinkled some on the top also. The caramel topping tasted great, but honestly, these cupcakes are so good that they don't need it. I think it takes away from the taste of the cupcakes. If I make these again, I will just add a crumb topping to them.


Apple Crisp Cupcakes
Source: "125 Best Cupcake Recipes" by Julie Hasson
Yields 12 cupcakes

Ingredients for Batter:
  • 1 ½ cups all-purpose flour
  • 1 ½ teaspoons baking powder
  • ¼ teaspoon salt
  • 1 cup granulated sugar
  • ½ cup unsalted butter, melted and cooled slightly
  • 2 eggs
  • ½ teaspoon vanilla
  • 1/3 cup milk
  • 1 apple, peeled, cored and diced

Ingredients for Streusel:

  • 3/4 cup packed light brown sugar
  • 1 teaspoon ground cinnamon
  • 3 tablespoons unsalted butter, at room temperature
  • Pinch salt

Ingredients for Frosting:

  • 1 cup whipping cream
  • ½ cup packed light brown sugar
  • ¼ cup light corn syrup
  • 1 tablespoon unsalted butter
  • ¼ teaspoon salt

Directions:

  • Preheat oven to 350 degrees. Line muffin pan with paper liners.
  • Batter: In a small bowl, mix together flour, baking powder and salt. In a large bowl, whisk together sugar, butter, eggs and vanilla until smooth. Alternately whisk in flour mixture and milk, making three additions of flour mixture and two of milk, beating until smooth. Stir in apple.
  • Streusel: In a bowl, whisk together brown sugar and cinnamon. Add butter and rub in with fingertips until mixture holds together in small, moist clumps.
  • Scoop about half of the batter into prepared pan. Sprinkle streusel over batter. Scoop remaining batter over streusel.
  • Bake in a preheated oven for 20 to 25 minutes or until golden brown and tops of cupcakes spring back when lightly touched. Let cool in pan on rack for 10 minutes. Remove from pan and let cool completely on rack.
  • Frosting: In a heavy saucepan, combine cream, brown sugar, corn syrup, butter and salt. Heat over medium-high heat, stirring, for 2 minutes or until sugar is dissolved and butter is melted. Reduce heat to medium. Cook, stirring often, for 10 to 15 minutes or until thickened. Remove from heat. Stir until smooth and pour into a bowl. Let cool in bowl, stirring occasionally. Caramel will thicken further as it sits and cools. Stir cooled caramel well and spread or spoon over cooled cupcakes.

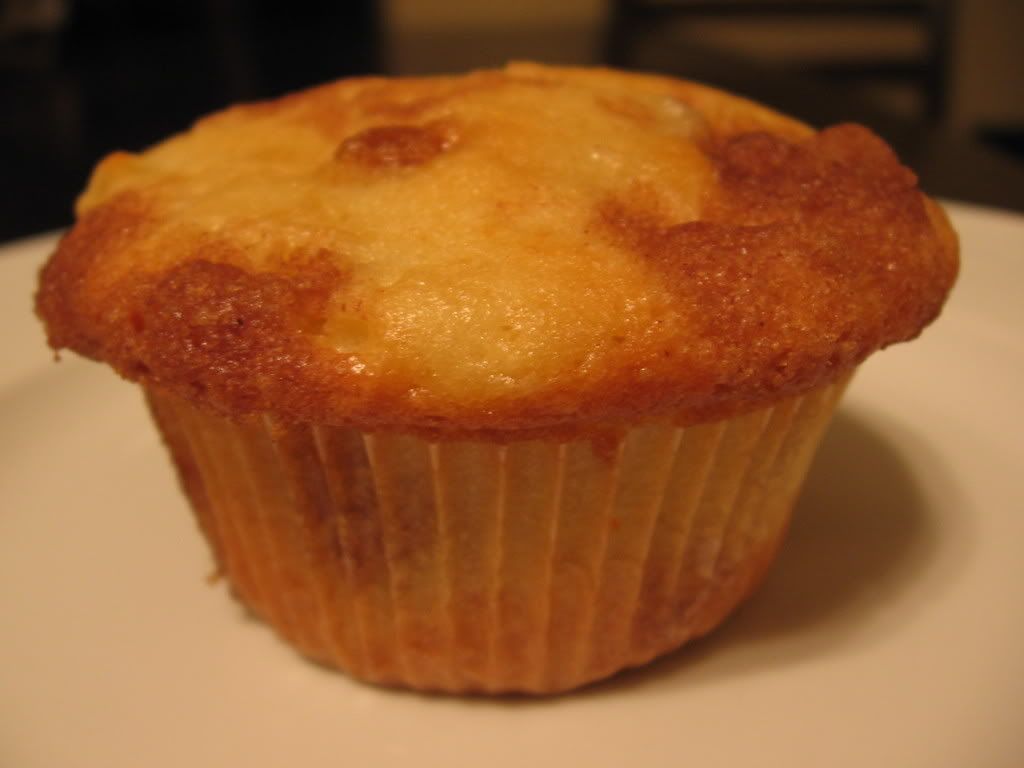
Annnnnnd - this is what they looked like when they came out of the oven! Mmmmmm.


And of course, a shot of the inside of the cupcake, showing all of it's streusely goodness!

Happy Cupcake Wednesday!


I was a cupcake baking machine last night! I made 3 kinds of cupcakes, all ridiculously delicious, caramely (it's a word to me) and fall-y (yeah, I have no issue with making up words). I made apple crisp cupcakes, bananas foster cupcakes, and banoffee cupcakes. I seriously can't pick a favorite, they were all awesome. I am declaring today "cupcake Wednesday" for my coworkers. Hopefully they will enjoy them as much as I did when I taste-tested them! Stayed tuned later today for recipes!

Tuesday, September 23, 2008

Quintuple Chocolate Brownies

Mmmmm fudgey. This is the first recipe I have made from Dorie Greenspan's book Baking: From My Home to Yours. These brownies turned out great! If you like cakey brownies, these are not for you. If you like rich, thick, fudgey, chocolately brownies, give these a try!


Quintuple Chocolate Brownies

Source: Baking: From My Home to Yours, by Dorie Greenspan

Ingredients for the Brownies:

  • ½ cup all-purpose flour
  • ¼ cup unsweetened cocoa powder
  • ½ tsp salt
  • 1 stick unsalted butter
  • 3 ounces unsweetened chocolate coarsely chopped
  • 3 ounces bittersweet or semi-sweet chocolate, coarsely chopped
  • 2 tbs strong coffee (I substituted Kahlua, mmmmm)
  • 1 cup sugar
  • 3 large eggs
  • 1 tsp vanilla extract
  • 6 ounces milk chocolate, coarsely chopped or 1 cup store-bought milk chocolate chips (I used chopped Dove candy bars)
  • 1 cup chopped nuts (I used walnuts)

Ingredients for the Glaze:

  • 6 ounces white chocolate, finely chopped, or 1 cup store-bought white chocolate chips
  • 1/3 cup heavy whipping cream

Directions:

  • Getting Ready: Center a rack in the oven, and preheat the oven to 325°F. Line a 9-inch baking pan with foil, butter the foil and place the pan on a baking sheet. Sift together the flour, cocoa and salt.
  • To Make the Brownies: Set a heatproof bowl over a saucepan of simmering water and add, in the following order, the butter, the two chocolates and the coffee. Keeping the pan over low heat, warm just until the butter and chocolates are melted- you don't want the ingredients to get so hot they separate, so keep an eye on the bowl. Stir gently, and when the mixture is smooth, set it aside for 5 minutes.
  • Using a whisk or a rubber spatula, beat the sugar into the chocolate mixture. Don't beat too vigorously- you don't want to add air to the batter- and don't be concerned about any graininess. Next, stir in the eggs one at a time, followed by the vanilla. You should have a smooth, glossy batter. If you're not already using a rubber spatula, switch to one now and gently stir in the dry ingredients, mixing only until they are incorporated. Finally, stir in the milk chocolate chips and the nuts. Scrape the batter into the pan.
  • Bake for about 35 minutes, or until a thin knife inserted into the center comes out streaked but not thickly coated. Transfer the pan to a cooling rack and let the brownies rest undisturbed for at least 30 minutes. Invert the brownies onto the rack and let cool completely. (I left my brownies in the pan to cool and glaze them, since other people had problems with the glaze running off the brownies).
  • To Make the Glaze: Put the white chocolate in a heatproof bowl. Bring the heavy cream to a boil and pour it over the chocolate. Wait 30 seconds, then, using a rubber spatula, gently stir until the chocolate is melted and the glaze is smooth. (I wanted a thicker glaze, so I only used about 1/4 cup of heavy cream).
  • Hold a long metal icing spatula in one hand and the bowl of glaze in the other. Pour the glaze onto the center of the brownies and use the spatula to nudge it evenly over the surface. Don't worry if it dribbles over the edges, you can trim the sides later (or not). Refrigerate the brownies for at least 30 minutes, or until the glaze is firm. (I recommend refrigerating overnight. I cut my brownies after about an hour and a half, and the glaze ran and was all messy).

Spaghetti Squash with Turkey Meatballs

I love spaghetti squash, and I've got to thank my mom for turning me on to it years ago. Granted, you are not going to be able to fool anyone into thinking that they are eating pasta, but I think it's a great healthy alternative. There are only 16 (yes, 16!) calories in half a cup of spaghetti squash! I like to just put some sauce & parmesan cheese on mine, and serve it with some turkey meatballs.

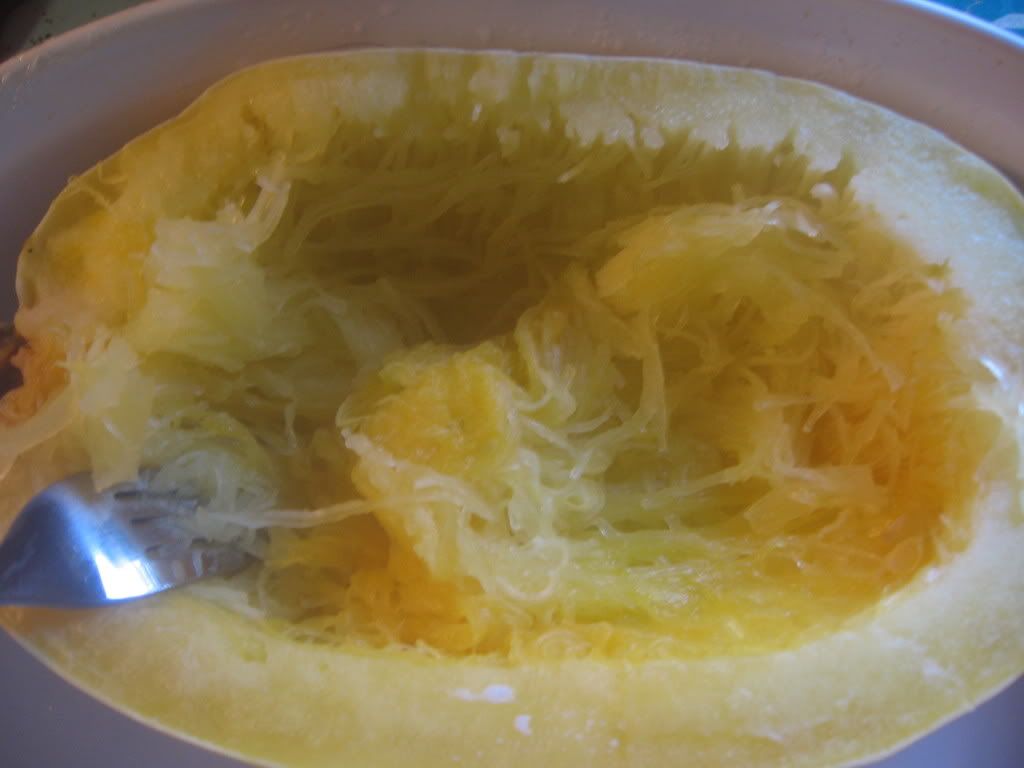
If you've never made spaghetti squash, it's easy! I cook mine in the microwave. Slice the squash in half, lengthwise, and scoop out the seeds and "guts." Then put it in a microwave safe dish, cut side up. Add about 1/4 cup of water to the bottom of the pan and cover with plastic wrap. Microwave on high for 10 minutes. Using a fork, pull apart the "strands" of squash.

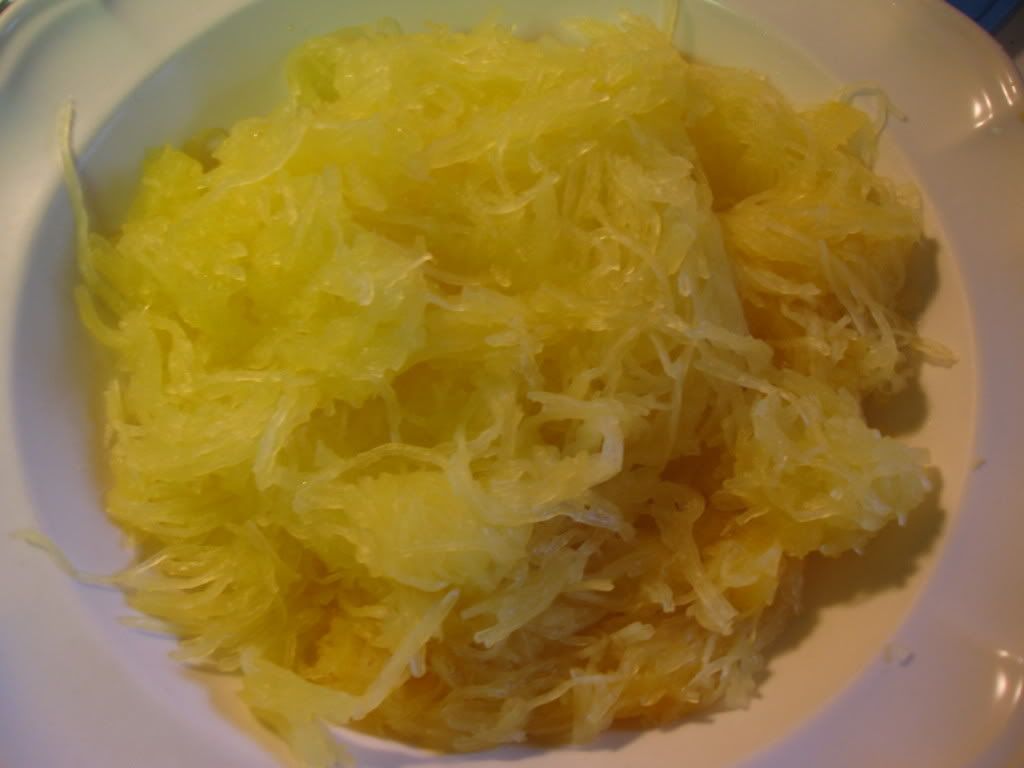
Tada! A lovely plate of spaghetti squash.
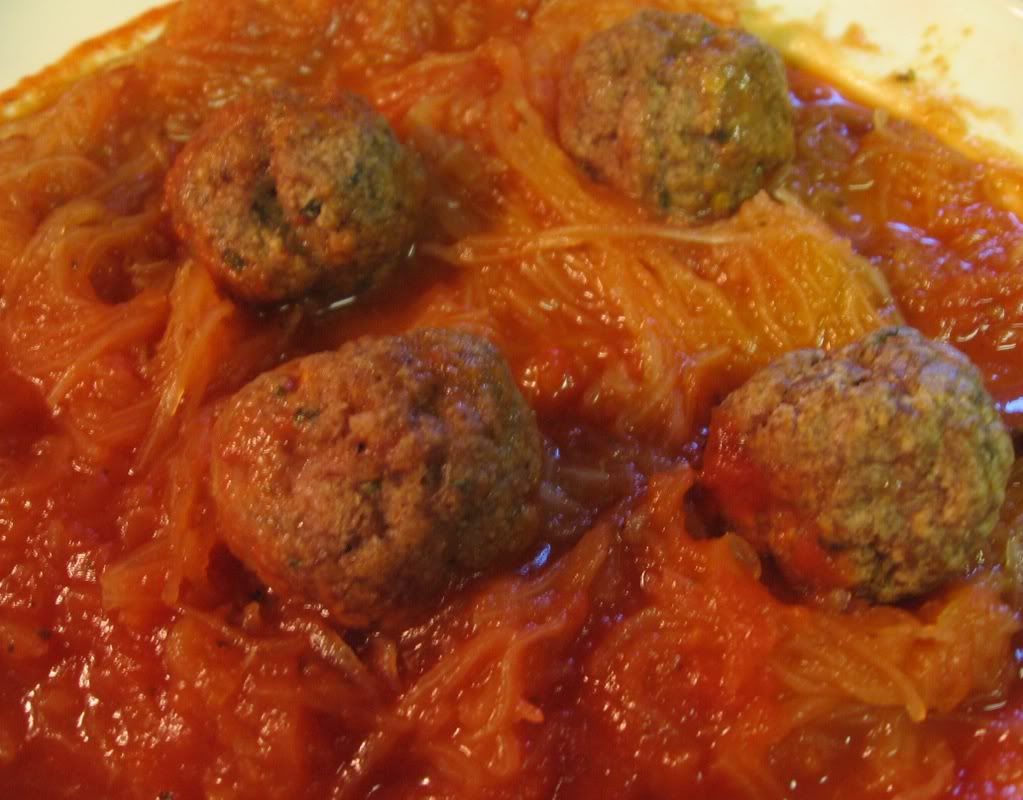
With sauce and turkey meatballs:
Turkey Meatballs

Ingredients:
  • 1 lb fresh, lean ground turkey
  • 1 egg, beaten
  • 1/2 cup breadcrumbs
  • 1 tablespoon worchestershire sauce
  • 2 cloves garlic (if you don't LOVE garlic, only use 1)
  • 1 teaspoon onion powder
  • 1/2 teaspoon red pepper flakes
  • 1 teaspoon salt

Directions:

  • Preheat oven to 375 degrees.
  • Mix all ingredients together in bowl, roll into balls.
  • Place in baking dish.
  • Bake for 15 minutes, or until cooked through.

Monday, September 1, 2008

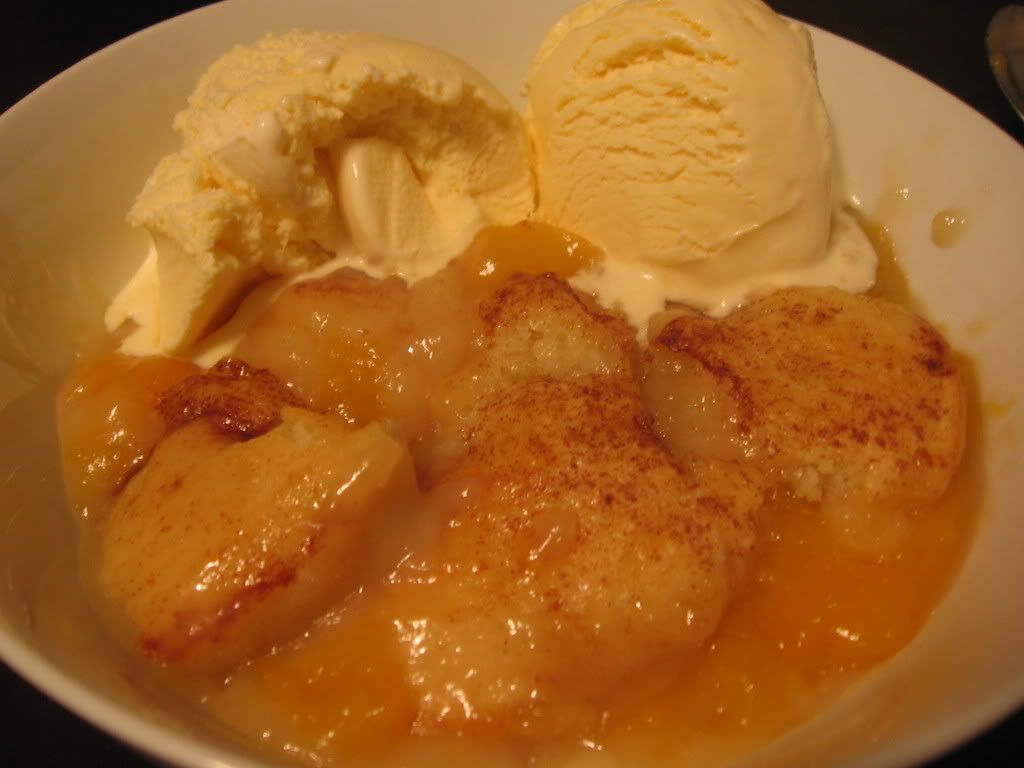
Peach Cobbler

I'm not a huge fan of peaches (I know, what a great way to get you enthused about this dish, right?). However, there were some great looking peaches at the farmer's market this weekend, and they were selling them cheap. I decided to make a cobbler instead of a crisp, because I was in the mood for something cakey. (Also, as an aside, when I was learning to say my name, I used to call myself Cakey instead of Vicki. Coincidence? Or a foreshadowing of my love for all things cake? You decide). I turned to Paula Deen for the recipe, and I have to admit that it was REALLY good, even though it was full of peaches. I'm sure if you love peaches, you will love this.


Peach Cobbler
Source: Paula Deen

Ingredients:

  • 4 cup peeled, sliced peaches
  • 2 cup sugar, divided
  • 1/2 cup water
  • 8 tablespoons (1 stick) butter
  • 1 1/2 cup self-rising flour
  • 1 1/2 cup milk
  • ground cinnamon, optional (I don't believe this should be optional. I think the cobbler would be a little bland without it).

Directions:

  • Preheat oven to 350 degrees.
  • Combine the peaches, 1 cup sugar, and water in a saucepan and mix well. Bring to a boil and simmer for 10 minutes. Remove from the heat.
  • Put the butter in a 3-quart baking dish and place in oven to melt.
  • Mix remaining 1 cup sugar, flour, and milk slowly to prevent clumping.
  • Pour mixture over melted butter. Do not stir. Spoon fruit on top, gently pouring in syrup. (The end result will be very runny. I had my doubts that it would rise and turn into something wonderful in the oven, but it did, so don't be nervous).
  • Sprinkle top with ground cinnamon, if using. Batter will rise to top during baking.
  • Bake for 30 to 45 minutes.
  • To serve, scoop onto a plate and serve with your choice of whipped cream or vanilla ice cream.