Showing posts with label dessert. Show all posts

Friday, December 26, 2008

Cherry Shortbread Cookies

Another one of my favorite Christmas cookies! This is another recipe that was passed down to me from my wonderful aunt. Although I only made red ones this year, you can also use green maraschino cherries and green food coloring, and dip them into milk chocolate.

Cherry Shortbread Cookies

Ingredients:

  • ½ cup chopped, drained maraschino cherries (put on paper towels to drain after chopping)
  • 1 ¼ cup flour
  • ½ cup butter
  • 3 tablespoons sugar
  • ½ tablespoon mlk
  • ½ tablespoon almond extract
  • food coloring
  • 1 bag of white chocolate chips

Directions:

  • Preheat oven to 325 degrees
  • Stir together flour and sugar
  • Cut in butter using a stand mixer or pastry blender until dough resembles fine crumbs
  • Stir in cherries, milk, food coloring, and almond extract
  • Form dough into a ball, knead until smooth
  • Roll dough into 1" balls, use the bottom of a glass to flatten them (I put a small piece of parchment paper on top of the dough first, so the dough does not stick to the glass)
  • Bake for 20 minutes until the cookies are firm and light brown on the bottom
  • Let cookies cool competely
  • Melt white chocolate chips in microwave
  • Dip half of each cookie into white chocolate, place on parchment paper to dry

Thursday, December 25, 2008

Pinwheel cookies

Every year when I make these cookies, I swear that I'm never going to make them again. Then I think about how pretty they are and how nice they look on a cookie tray, and I cave. These are very labor intense - it involves rolling out 9 pieces of dough almost paper thin, but I think it's worth it! The dough is a shortbread dough, so it's not overly sweet, and the cookies taste great with coffee or hot cocoa.

Pinwheel Cookies
Original Source: Unknown, my aunt gave me the recipe

Ingredients: (you will need to make 3 separate batches, so when you are gathering ingredients, keep in mind that you will need 3 times the amounts listed below):

  • 1 ¼ cup flour
  • ½ cup butter
  • ½ tablespoon almond extract
  • 3 tablespoons sugar
  • ½ tablespoon milk
  • food coloring (red and green)
  • pearl sugar

Directions:

  • Preheat oven to 375 degrees
  • Stir together flour and sugar
  • Cut in butter using either a stand mixer or pastry blender
  • Stir in milk, almond extract and food coloring
  • Form dough into a ball and knead until smooth (the dough is dry, it will take some work to incorporate all the ingredients into a smooth dough)
  • Make 3 batches - red, green and white
  • Chill dough 1 hour
  • Separate each color of dough into 3rds for a total of 9 balls of dough
  • Roll each ball of dough into an 8x10 sheet on wax paper
  • Chill sheets of dough until firm
  • Layer one sheet of each color, brushing lightly with milk in between layers
  • Roll jellyroll style from the 10" end, rolling as tightly as possible
  • Chill logs until firm (I put them in the freezer for about 30 minutes)
  • Brush logs with beaten egg white, then roll in pearl sugar
  • Slice the logs into ¼" slices
  • Bake on parchment paper for 10 minutes

Oreo bark

A coworker of mine gave me a little tin of this stuff last Christmas, and I was hooked. It is SO good, and I'll warn you, pretty addictive. An added bonus is that it is a cinch to make, but looks pretty impressive.


Oreo Bark

Ingredients:
  • 12 oz. milk chocolate (I use Ghirardelli chips)
  • 6 oz. white chocolate
  • 15 Oreos

Directions:

  • Put the oreos into a large ziploc bag and crush them until they are in small, bite-sized pieces.
  • Melt the milk chocolate in a double boiler.
  • When chocolate is melted and smooth, carefully stir in Oreo pieces.
  • Spread the mixture onto a foil covered cookie sheet, trying to keep the cookies in an even layer.
  • Melt white chocolate in microwave and drizzle it on top. Use a knife to swirl.
  • Let cool & harden (I put the tray in the refrigerator to speed things up). Break into bite sized pieces.

Wednesday, September 24, 2008

Banoffee Cupcakes

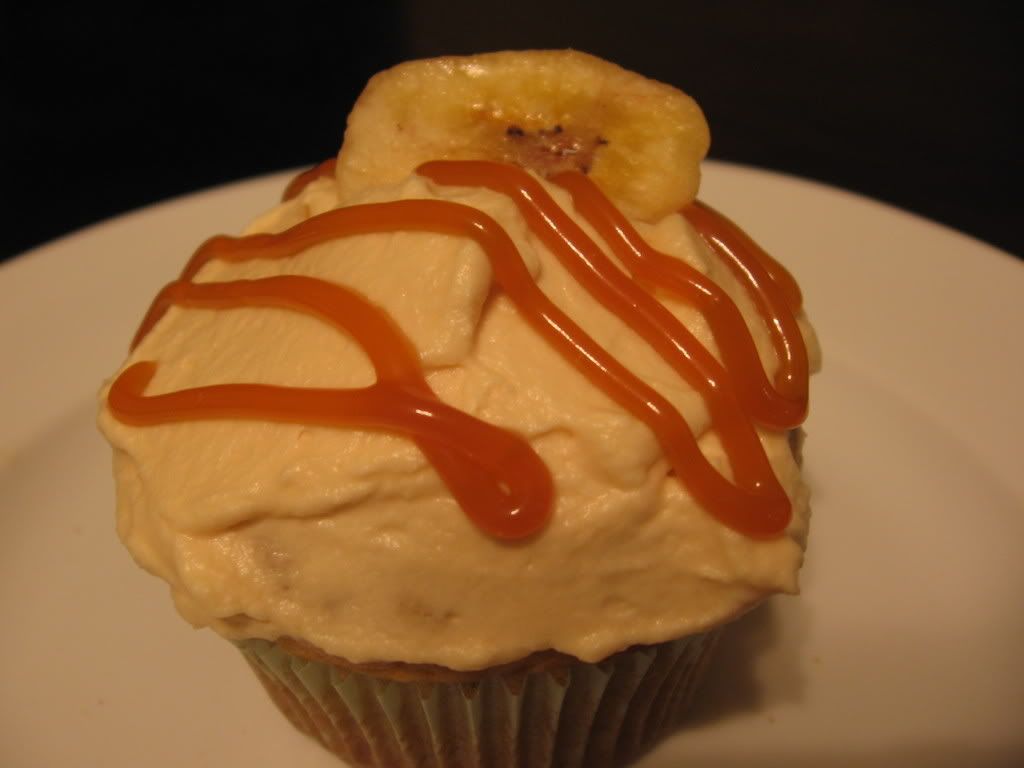
I've been following this great blog called How to Eat a Cupcake. Every week, Cassie posts a poll, allowing her readers to vote on her next cupcake. I voted for the banoffee cupcakes (even though I had never heard of banoffee, I knew the combination of bananas and caramel could not be bad) and crossed my fingers that they would win, and much to my shagrin, they did! There are no words to describe how delicious these cupcakes are. And the frosting? Holy crap. I could eat it by the bucket full (I followed her suggestion of using the caramel apple dip to sweeten the whipping cream). The original recipe is from Cupcake Heaven, by Susannah Blake, a book which is now on my Amazon wish list.

Make these cupcakes. Now.


Banoffee Cupcakes

Original Source: Cupcake Heaven, by Susannah Blake

Brought to you by Cassie at How to Eat a Cupcake

Yield: The original recipe says 10, Cassie got 8, and I got 5 large cupcakes.

Ingredients:

  • 4 tablespoons unsalted butter, at room temperature
  • 1/3 cup packed brown sugar
  • 1 egg, beaten
  • 1 ripe banana, mashed
  • 1 cup self-rising flour
  • 4 chewy caramels, chopped
  • Heath bits to sprinkle on top

Ingredients for Frosting:

  • 2/3 cup heavy cream, whipped
  • 3-4 tablespoons dulce de leche or caramel sauce

Directions:

  • Preheat the oven to 350°F.
  • Beat the butter and sugar together in a bowl until creamy, then beat in the egg, a little at a time. Fold in the mashed banana, then sift the flour into the mixture and fold in, followed by the caramels (I took Cassie's suggestion and tossed the caramels in the flour first to keep them from sticking together).
  • Spoon the mixture into the paper liners. Sprinkle the top of each cupcake with Heath bar pieces, and bake in the preheated oven for about 16 minutes until risen and a skewer inserted in the center comes out clean. Transfer to a wire rack to cool.
  • To decorate, swirl the cream over each of the cupcakes, then drizzle with a spoonful of dulce de leche or caramel sauce and top with slices of banana. (This was not included in the directions, but I beat the heavy cream in my mixer until it reached the consistency of whipped cream, then followed Cassie's suggestion of beating in the caramel apple dip to sweeten. I also topped mine with banana chips so I didn't have to worry about soggy brown bananas).

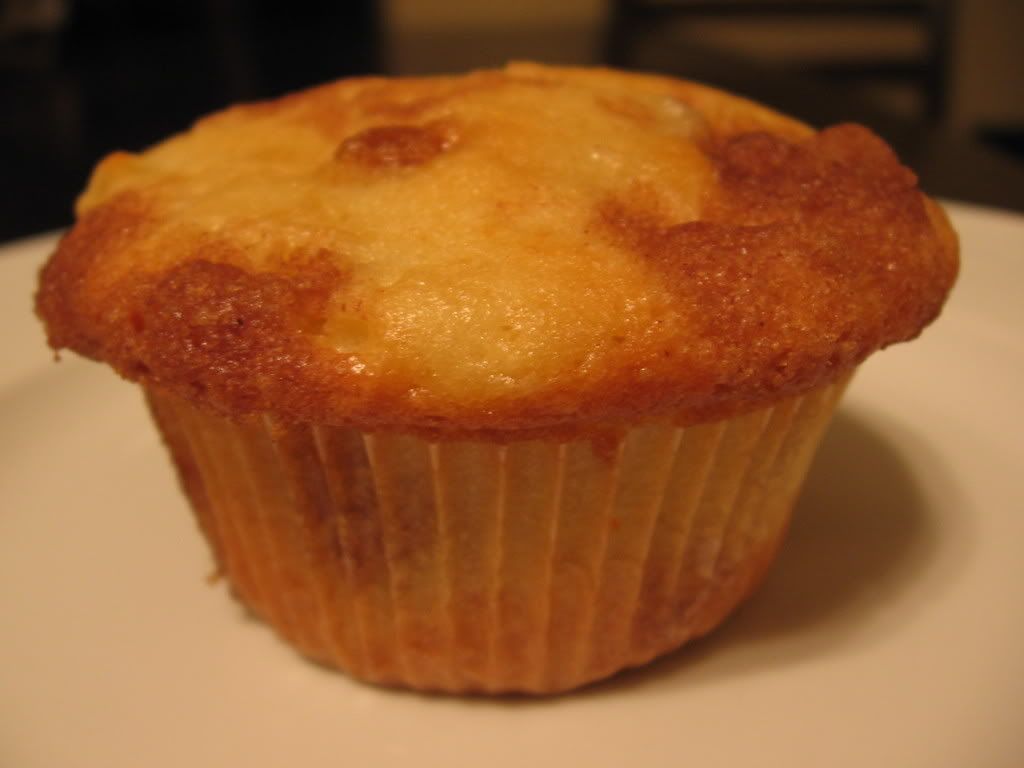
This is what they looked like after baking! Mmmmm.


Bananas Foster Cupcakes

Oh. My. God. Seriously. These are SO good. Bananas foster is one of my favorite desserts, and about a month ago I had the idea of turning it into a cupcake. I googled and googled and googled, but couldn't find much, and I wasn't happy with the recipes I did find. Finally, I stumbled across this recipe on recipezaar. I knew it had to be good since it actually involved making bananas foster and mixing it into the batter. These were really moist and the flavor was AMAZING. Enjoy!


Bananas Foster Cupcakes

Source: recipezaar

Yield: 16 cupcakes

Ingredients for Banana Mixture:

  • ¾ cup unsalted butter
  • ½ cup packed brown sugar
  • ½ teaspoon cinnamon
  • 2 ripe but still firm bananas, quartered (halved crosswise, then lengthwise)
  • 2 tablespoons dark rum
  • ½ teaspoon vanilla extract

Ingredients for Batter:

  • 2 ½ cups all-purpose flour
  • 1 teaspoon baking soda
  • 1/4 teaspoon salt
  • ¾ cup butter, softened
  • 1 ½ cups granulated sugar
  • 3 eggs
  • 1 teaspoon vanilla extract
  • ½ teaspoon dark rum
  • ¾ cup sour cream

Ingredients for Frosting:

  • 8 ounces cream cheese, softened
  • 1 teaspoon ground cinnamon
  • 3 cups powdered sugar, sifted
  • ½ cup butter, softened
  • ¾ teaspoon vanilla

Directions:

  • Preheat oven to 350 degrees.
  • For the banana mixture: In a saute pan over medium heat, combine the butter, brown sugar, and cinnamon. Cook until butter melts and sugar is dissolved (4 to 5 minutes). Add the banana slices and cook until tender, turning once for 1 to 2 minutes per side. Stir together rum and vanilla. Turn off the burner and add the rum mixture to the pan. Using a long match, light the alcohol by placing the flame just in the outer edge of the pan. Stand as far back as possible. FLAMBE! (this is the fun part.) The flame should extingish in a few seconds. Gently shake the pan from side to side to coat the bananas with the sauce. Spoon the bananas into a bowl and set aside.
  • For the cupcakes: In a large bowl, cream butter and sugar with electric mixer until light and fluffy. In a medium bowl, combine the flour, baking soda, and salt. Add eggs, vanilla, rum and banana mixture. Mix well. Add flour mixture alternately with sour cream; blend thoroughly but do not overmix. Pour into prepared cupcake pans.
  • Bake 20 - 25 minutes or until toothpick inserted comes out clean. Cool for 1- minutes in pan on rack. Remove and cool completely before frosting.
  • For the frosting: Beat together cream cheese, butter, cinnamon and vanilla on medium speed until light and fluffy. Add about half the powdered sugar and beat until mixed well. Then gradually add the remaining powdered sugar until you reach a spreading consistency (I didn't use all of it, I'd say there was about 1/3 cup leftover).

Apple Crisp Cupcakes

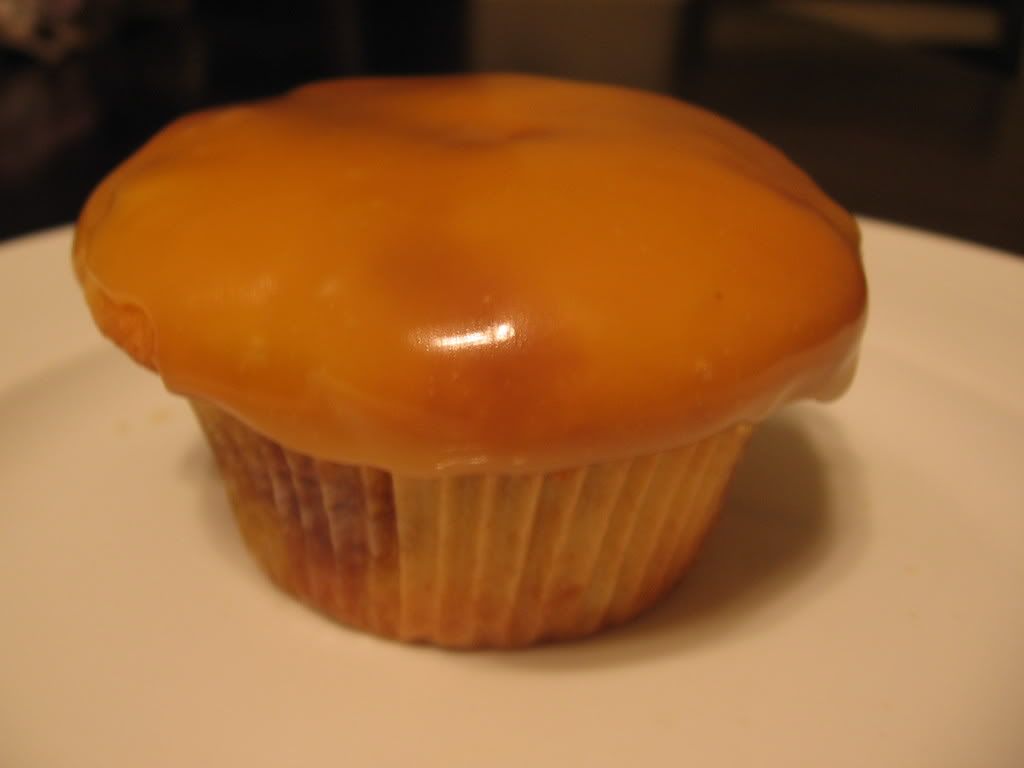
I've been in a fall food kind of mood. When I saw this cupcake recipe, I knew that I had to make them mine, and I was not disappointed. They were really moist, and I loved the streusel in the middle. I actually had a bunch of streusel left over so I sprinkled some on the top also. The caramel topping tasted great, but honestly, these cupcakes are so good that they don't need it. I think it takes away from the taste of the cupcakes. If I make these again, I will just add a crumb topping to them.


Apple Crisp Cupcakes
Source: "125 Best Cupcake Recipes" by Julie Hasson
Yields 12 cupcakes

Ingredients for Batter:
  • 1 ½ cups all-purpose flour
  • 1 ½ teaspoons baking powder
  • ¼ teaspoon salt
  • 1 cup granulated sugar
  • ½ cup unsalted butter, melted and cooled slightly
  • 2 eggs
  • ½ teaspoon vanilla
  • 1/3 cup milk
  • 1 apple, peeled, cored and diced

Ingredients for Streusel:

  • 3/4 cup packed light brown sugar
  • 1 teaspoon ground cinnamon
  • 3 tablespoons unsalted butter, at room temperature
  • Pinch salt

Ingredients for Frosting:

  • 1 cup whipping cream
  • ½ cup packed light brown sugar
  • ¼ cup light corn syrup
  • 1 tablespoon unsalted butter
  • ¼ teaspoon salt

Directions:

  • Preheat oven to 350 degrees. Line muffin pan with paper liners.
  • Batter: In a small bowl, mix together flour, baking powder and salt. In a large bowl, whisk together sugar, butter, eggs and vanilla until smooth. Alternately whisk in flour mixture and milk, making three additions of flour mixture and two of milk, beating until smooth. Stir in apple.
  • Streusel: In a bowl, whisk together brown sugar and cinnamon. Add butter and rub in with fingertips until mixture holds together in small, moist clumps.
  • Scoop about half of the batter into prepared pan. Sprinkle streusel over batter. Scoop remaining batter over streusel.
  • Bake in a preheated oven for 20 to 25 minutes or until golden brown and tops of cupcakes spring back when lightly touched. Let cool in pan on rack for 10 minutes. Remove from pan and let cool completely on rack.
  • Frosting: In a heavy saucepan, combine cream, brown sugar, corn syrup, butter and salt. Heat over medium-high heat, stirring, for 2 minutes or until sugar is dissolved and butter is melted. Reduce heat to medium. Cook, stirring often, for 10 to 15 minutes or until thickened. Remove from heat. Stir until smooth and pour into a bowl. Let cool in bowl, stirring occasionally. Caramel will thicken further as it sits and cools. Stir cooled caramel well and spread or spoon over cooled cupcakes.

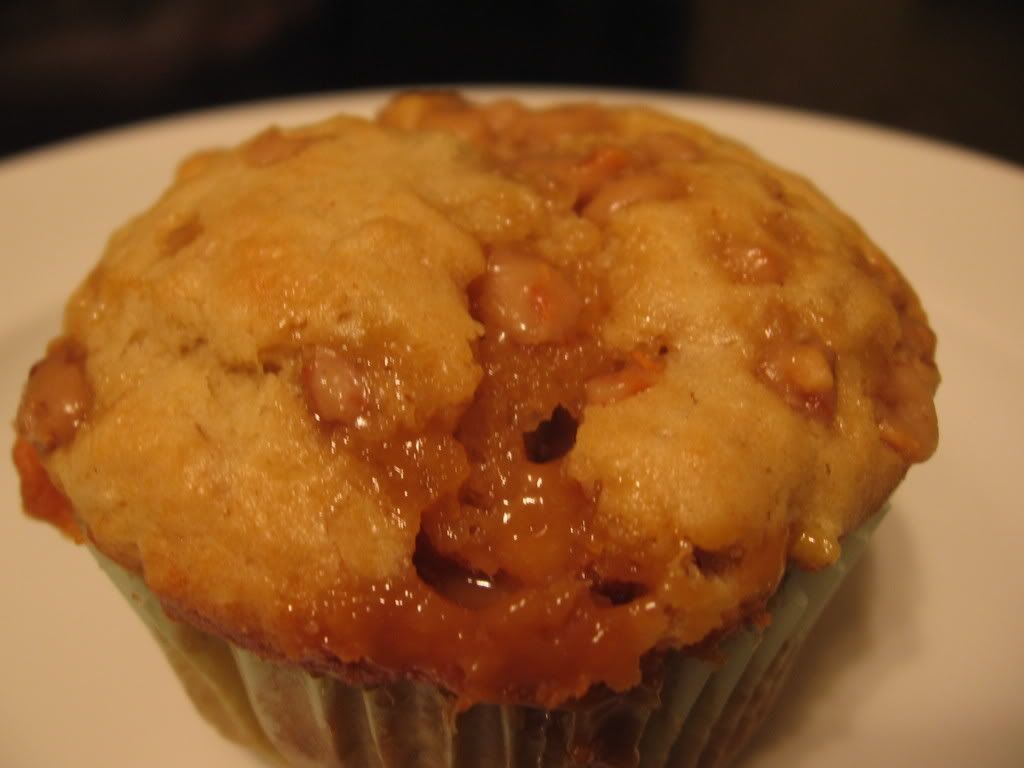
Annnnnnd - this is what they looked like when they came out of the oven! Mmmmmm.


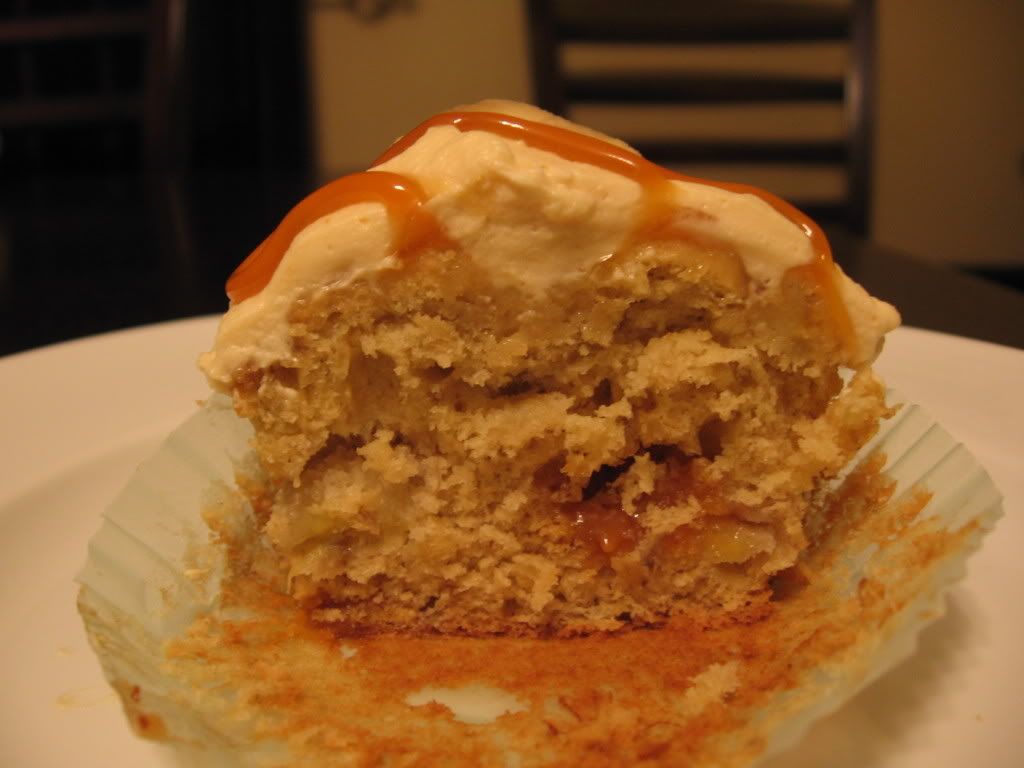
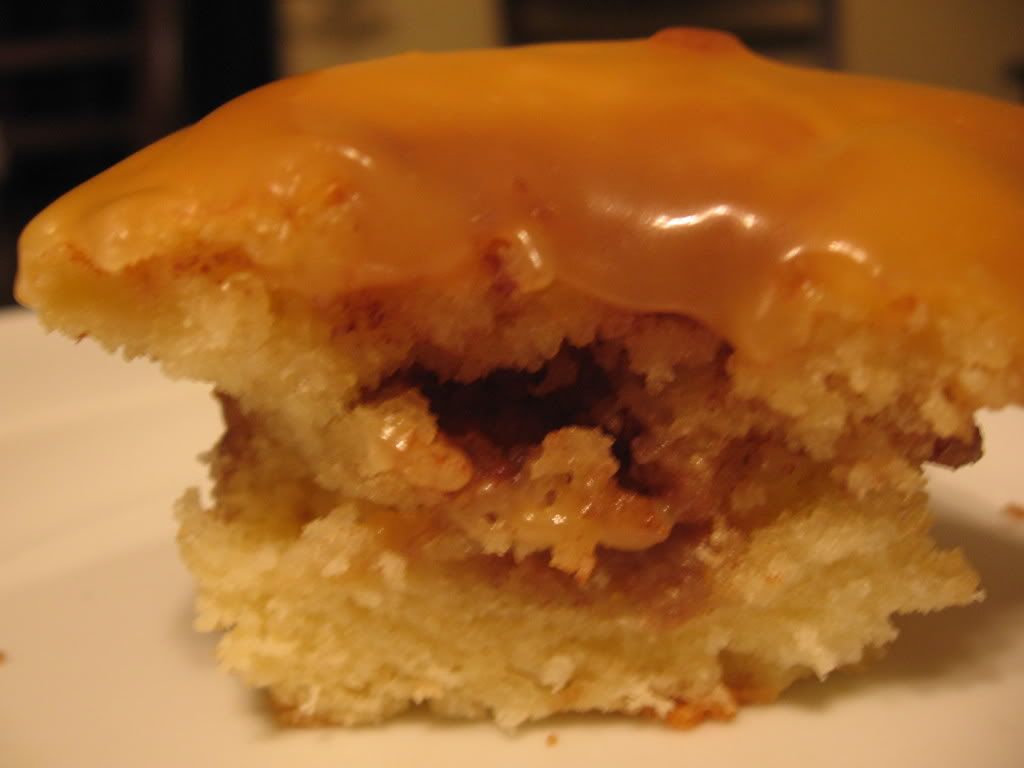
And of course, a shot of the inside of the cupcake, showing all of it's streusely goodness!

Tuesday, September 23, 2008

Quintuple Chocolate Brownies

Mmmmm fudgey. This is the first recipe I have made from Dorie Greenspan's book Baking: From My Home to Yours. These brownies turned out great! If you like cakey brownies, these are not for you. If you like rich, thick, fudgey, chocolately brownies, give these a try!


Quintuple Chocolate Brownies

Source: Baking: From My Home to Yours, by Dorie Greenspan

Ingredients for the Brownies:

  • ½ cup all-purpose flour
  • ¼ cup unsweetened cocoa powder
  • ½ tsp salt
  • 1 stick unsalted butter
  • 3 ounces unsweetened chocolate coarsely chopped
  • 3 ounces bittersweet or semi-sweet chocolate, coarsely chopped
  • 2 tbs strong coffee (I substituted Kahlua, mmmmm)
  • 1 cup sugar
  • 3 large eggs
  • 1 tsp vanilla extract
  • 6 ounces milk chocolate, coarsely chopped or 1 cup store-bought milk chocolate chips (I used chopped Dove candy bars)
  • 1 cup chopped nuts (I used walnuts)

Ingredients for the Glaze:

  • 6 ounces white chocolate, finely chopped, or 1 cup store-bought white chocolate chips
  • 1/3 cup heavy whipping cream

Directions:

  • Getting Ready: Center a rack in the oven, and preheat the oven to 325°F. Line a 9-inch baking pan with foil, butter the foil and place the pan on a baking sheet. Sift together the flour, cocoa and salt.
  • To Make the Brownies: Set a heatproof bowl over a saucepan of simmering water and add, in the following order, the butter, the two chocolates and the coffee. Keeping the pan over low heat, warm just until the butter and chocolates are melted- you don't want the ingredients to get so hot they separate, so keep an eye on the bowl. Stir gently, and when the mixture is smooth, set it aside for 5 minutes.
  • Using a whisk or a rubber spatula, beat the sugar into the chocolate mixture. Don't beat too vigorously- you don't want to add air to the batter- and don't be concerned about any graininess. Next, stir in the eggs one at a time, followed by the vanilla. You should have a smooth, glossy batter. If you're not already using a rubber spatula, switch to one now and gently stir in the dry ingredients, mixing only until they are incorporated. Finally, stir in the milk chocolate chips and the nuts. Scrape the batter into the pan.
  • Bake for about 35 minutes, or until a thin knife inserted into the center comes out streaked but not thickly coated. Transfer the pan to a cooling rack and let the brownies rest undisturbed for at least 30 minutes. Invert the brownies onto the rack and let cool completely. (I left my brownies in the pan to cool and glaze them, since other people had problems with the glaze running off the brownies).
  • To Make the Glaze: Put the white chocolate in a heatproof bowl. Bring the heavy cream to a boil and pour it over the chocolate. Wait 30 seconds, then, using a rubber spatula, gently stir until the chocolate is melted and the glaze is smooth. (I wanted a thicker glaze, so I only used about 1/4 cup of heavy cream).
  • Hold a long metal icing spatula in one hand and the bowl of glaze in the other. Pour the glaze onto the center of the brownies and use the spatula to nudge it evenly over the surface. Don't worry if it dribbles over the edges, you can trim the sides later (or not). Refrigerate the brownies for at least 30 minutes, or until the glaze is firm. (I recommend refrigerating overnight. I cut my brownies after about an hour and a half, and the glaze ran and was all messy).

Monday, September 1, 2008

Peach Cobbler

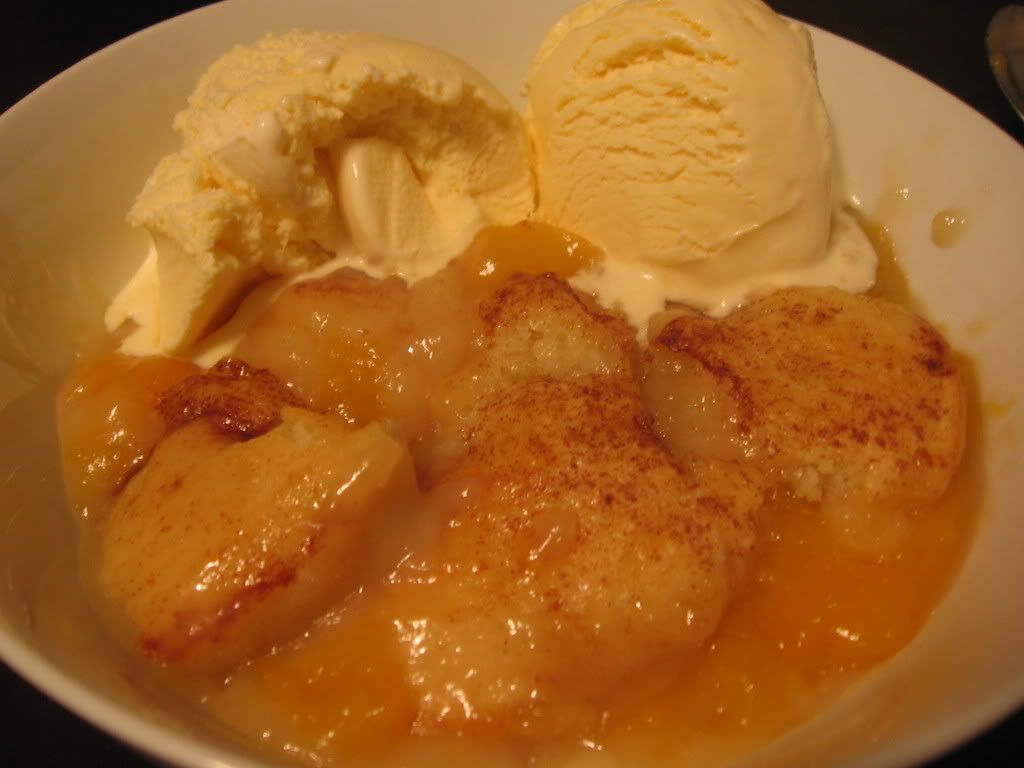
I'm not a huge fan of peaches (I know, what a great way to get you enthused about this dish, right?). However, there were some great looking peaches at the farmer's market this weekend, and they were selling them cheap. I decided to make a cobbler instead of a crisp, because I was in the mood for something cakey. (Also, as an aside, when I was learning to say my name, I used to call myself Cakey instead of Vicki. Coincidence? Or a foreshadowing of my love for all things cake? You decide). I turned to Paula Deen for the recipe, and I have to admit that it was REALLY good, even though it was full of peaches. I'm sure if you love peaches, you will love this.


Peach Cobbler
Source: Paula Deen

Ingredients:

  • 4 cup peeled, sliced peaches
  • 2 cup sugar, divided
  • 1/2 cup water
  • 8 tablespoons (1 stick) butter
  • 1 1/2 cup self-rising flour
  • 1 1/2 cup milk
  • ground cinnamon, optional (I don't believe this should be optional. I think the cobbler would be a little bland without it).

Directions:

  • Preheat oven to 350 degrees.
  • Combine the peaches, 1 cup sugar, and water in a saucepan and mix well. Bring to a boil and simmer for 10 minutes. Remove from the heat.
  • Put the butter in a 3-quart baking dish and place in oven to melt.
  • Mix remaining 1 cup sugar, flour, and milk slowly to prevent clumping.
  • Pour mixture over melted butter. Do not stir. Spoon fruit on top, gently pouring in syrup. (The end result will be very runny. I had my doubts that it would rise and turn into something wonderful in the oven, but it did, so don't be nervous).
  • Sprinkle top with ground cinnamon, if using. Batter will rise to top during baking.
  • Bake for 30 to 45 minutes.
  • To serve, scoop onto a plate and serve with your choice of whipped cream or vanilla ice cream.

Monday, August 11, 2008

Cake Batter Ice Cream

One of my favorite indulgences is Coldstone Creamery cake batter ice cream. Thankfully, the store near us closed, ending the era in which we had ice cream for dinner on a semi-regular basis. When I found this recipe, I had to try it. I was not disappointed, it was pretty spot-on. I added some crushed graham cracker crust and slivered almonds to it at the end, just the way I like my Coldstone!

Also, this was the first time I used the ice cream maker attachment for my Kitchenaid, and it was awesome! Two thumbs up from this girl.

This picture is not appetizing at all. Believe me, it tastes much better than it looks.


Cake Batter Ice Cream

Source: recipezaar.com

Ingredients:

  • 1 cup whole milk, well chilled
  • 3/4 cup granulated sugar
  • 2 cups heavy cream, well chilled
  • 1 teaspoon pure vanilla extract
  • 2/3 cup yellow cake mix

Directions:

  • In a medium bowl, whisk the milk and granulated sugar until the sugar is dissolved.
  • Stir in the heavy cream and vanilla.
  • Stir in cake mix, making sure there are no lumps. (I sifted the cake mix)
  • Pour mixture into the freezer bowl of your ice cream maker and let mix until it has thickened (about 25-30 minutes).
  • Remove ice cream from freezer bowl and place into a separate container.
  • Place freezer bowl and the ice cream into the freezer to further harden.

Saturday, August 2, 2008

Blueberry Almond Cake

I've had this recipe on my "to try" list for months. I bought way too many blueberries at the local farmer's market last weekend and finally decided it was time to try it. This cake was amazing, very rich and moist with the almonds providing a nice crunch. Don't be dumb like me, don't hold on to this recipe for months before trying it!


Blueberry Almond Cake

Source: Deborah's Culinary Confections

Ingredients:
  • 1 stick butter, softened
  • 1 cup granulated sugar
  • 1 egg
  • 1/2 cup sour cream
  • 1/2 teaspoon vanilla extract
  • 1 teaspoon lemon juice
  • 1 1/2 cups flour
  • 1 teaspoon baking powder
  • 1/4 teaspoon salt
  • 1/2 cup sliced almonds
  • 1 cup blueberries
  • 1 can Duncan Hines whipped cream cheese frosting (or home made, if you are not as lazy as I am)

Directions:

  • Preheat oven to 350 degrees. Grease a 8x8 baking pan.
  • In a large bowl combine the butter and granulated sugar, beat until smooth. Beat in egg, sour cream, vanilla extract and lemon juice. Add flour, baking powder and salt and mix until combined. Fold in almonds and blueberries then pour into baking pan - spread evenly.
  • Bake for 30-35 minutes until toothpick inserted in middle of cake comes out clean. Allow to cool before frosting with cream cheese frosting and cutting into squares.

Almond Poppy Seed Angel Food Cake

I'm such a bad blogger that I'm just now posting a dessert that I made for Fourth of July. I feel guilty for keeping this one from you for so long, because it is super healthy (127 calories per slice and NO fat) and delicious.

I was terrified to try an angel food cake. I've never had to beat egg whites into any sort of peaks before, and know that it can turn into a disaster if beaten too long. So before I attempted to make this, I read up on "the egg foam method" in Alton Brown's baking book, "I'm Just Here For More Food" (an EXCELLENT read, by the way). I knew that Alton would explain everything I needed to know in order to make the cake great, and I was not disappointed. Me + Alton + BFFs.

I topped it with cool whip light and some strawberries that I sliced and refrigerated with a little splenda overnight. The original recipe was lemon-poppy seed, but since I'm not a big fan of lemon desserts, I substituted almond extract for the 2 teaspoons of fresh lemon zest and 1 teaspoon of lemon extract that the original recipe called for (now you can turn it back into lemon if you really want to, but the almond was awesome).


Almond Poppy Seed Angel Food Cake

Source: The Big Book of Diabetic Desserts

Ingredients:

  • 1 cup cake flour
  • ¾ cup Splenda
  • ¼ cup cornstarch
  • 1 tablespoon poppy seeds
  • 12 large egg whites
  • 2 teaspoons almond extract
  • ½ teaspoon cream of tartar
  • ¾ cup granulated sugar

Directions:

  • Preheat oven to 350 degrees.
  • Sift together flour, Splenda, and cornstarch. Stir in poppy seeds and set aside.
  • Combine egg whites and cream of tartar in a large bowl. Beat at medium speed until foamy. Beat in almond extract.
  • Beat in sugar, one tablespoon at a time, beating at high speed until stiff peaks form.
  • Spoon flour mixture over the egg white mixture in four additions, gently folding in after each addition. Pour batter into an ungreased 10 inch tube pan.
  • Bake 20 to 25 minutes until a toothpick inserted in center of cake comes out clean.
  • Invert cake pan and cool cake completely.
  • Loosen cake from sides of pan with a thin metal spatula. Invert cake onto a serving platter.


Monday, May 19, 2008

Double Peanut Butter Cheesecake Swirl Brownies

I've needed an excuse to make these brownies since I saw them over at Blonde Ambition in the Kitchen in February. I knew I had to make these for some sort of event, otherwise I would sit and eat the entire batch. I think I will refer to these as the "Holy Trinity of Brownies." Peanut butter, cheesecake, and brownies...three of my favorite things all in one amazing, ridiculous dessert. They take a little effort because of the swirling, but they are so worth it. Amazing.


Double Peanut Butter Cheesecake Swirl Brownies

Source: Blonde Ambition in the Kitchen

Ingredients for Brownies

  • 3/4 cup butter, very soft (not melted but softer than room temp)
  • 1 cup sugar
  • 1 TBS vanilla extract
  • 2 large eggs1 oz. unsweetened baking chocolate, melted
  • 1 oz. semi-sweet baking chocolate, melted
  • 1/2 cup all purpose flour
  • 1/2 cup cocoa powder
  • 1/4 tsp baking powder1/4 tsp salt

Ingredients for peanut butter cheesecake swirl

  • 4 oz cream cheese, softened
  • 1/2 cups creamy PB
  • 1/3 cup sugar
  • 1 egg
  • 1 tsp vanilla

5-6 peanut butter cups for topping (cut into 6-8 pieces each)

Directions:

  • Preheat oven to 350. Line an 8x8" square pan with foil and lightly coat with cooking spray.
  • In a microwave safe bowl melt the two baking chocolate squares in 30 second intervals stirring after each interval until smooth and melted after stirring. Do not scortch! Remove from microwave and allow to come to room temperature.
  • In a large mixing bowl, Beat together butter and sugar until combined. Beat in eggs one at a time until blended. Add vanilla and melted chocolate. Mix to combine. Combine dry ingredients in medium bowl and wisk together. Gradually stir dry ingredients into butter mixture. Do not overmix.
  • In separate mixing bowl, beat together cream cheese, peanut butter sugar and vanilla until smooth. Add egg and beat until just combined.
  • Spread about 2/3 of chocolate brownie batter into prepared pan. Evenly drop 1/2 of cheesecake batter in dollups over brownie batter. Run a knife through both mixtures to slightly swirl.
  • Dollop remaining brownie batter and cheesecake batter over swirled mixture. Run knife through the browine and cheesecake dollups (not all the way through the already swirled layer) to create a swirled pattern.
  • Bake for 40-45 minutes**, or until center is set and a toothpick inserted in the center has a few crumbs stuck to it. Do not overbake or they will harden, if underbaked they will be too gooey. Every oven is different so watch and check these after about 35-40 minutes of baking to ensure propper doneness.
  • **After about 35-40 minutes of baking (with about 5-7 minutes of baking time left, you just need to eyeball it) gently place cut up Reese's cups over top of almost fully baked brownies. Finish baking until a toothpick inserted in the center has a few crumbs stuck to it. The Reese's PB cups will melt but hold their shape slightly. Cool completely on wire rack before cutting and serving.

Sunday, May 18, 2008

Stuffed Strawberries

I saw this recipe on Amber's Delectable Delights months ago and tucked it away until strawberry season. I hosted a baby shower for my sister in law this weekend, and figured these would be perfect. They were really easy to make, and everyone raved about them. Unfortunately, I didn't get a good picture of them, this picture is cropped out of a picture of the whole food table, hence the poor quality. Amber has a great picture in her blog, you should look at hers instead.


Stuffed Strawberries

Source: Amber's Delectable Delights

Ingredients:

  • 1 pint fresh strawberries
  • 1 (8 ounce) package cream cheese, softened
  • 1/2 cup confectioners' sugar, or to taste
  • 2 tablespoons orange flavored liqueur, or to taste (I used vanilla extract instead)

Directions:

  • Cut the tops off of the strawberries and stand upright on the cut side.
  • Make a cut 3/4 of the way down from the tip of the strawberry towards the bottom.
  • Beat together the cream cheese, sugar, and liqueur until smooth in a mixer or a food processor. Place into a piping bag with a star tip.
  • Pipe into each strawberry and arrange on a serving platter.

Tuesday, April 22, 2008

Ultimate Oreo Cake

I've been taking a cake decorating class, and figured that as long as I have to bake a cake to decorate every week, I may as well try out some new cake recipes while I'm at it. I'm trying to stick to easy recipes, since I have to bake and frost these after work for class the next day. So these "doctored up" cake mix recipes are great. This one was a combination of a couple of different recipes, and it turned out amazing. Seriously, if you like oreos, this cake is for you! A word of caution on the filling though - this recipe makes A LOT. I did 3 tiers of filling and still had a bunch left over, so I would consider cutting the recipe in half next time. Also, the cake recipe was originally for cupcakes, so if you want to make cupcakes, click on the link for Beantown Baker. Enjoy! Next up is a fresh blueberry cake with sweet cream cheese filling!


Ultimate Oreo Cake
Source: Cake - Beantown Baker Filling: Cake Central

Ingredients for cake:

  • 18 oreo cookies
  • 1 package plain white cake mix
  • 1 cup sour cream
  • 1/2 cup vegetable oil
  • 3 large eggs
  • 1 tsp vanilla extract

Ingredients for filling:

  • 2 1/2 cups heavy cream
  • 1/4 cup confectioner's sugar
  • 1/2 teaspoon pure vanilla extract
  • 20 chocolate sandwich cookies, crushed

Directions for cake:

  • Preheat oven to 350 degrees and grease & flour pan. (I used two 8" rounds).
  • Place the cake mix, oil, sour cream, eggs and vanilla in a large mixing bowl and blend with an electric mixer on low for 30 seconds. Scrape down the sides and beat again on medium about 1.5 minutes more.
  • Fold oreos into the batter and pour batter into pans.
  • Bake about 25-30 minutes until toothpick inserted in middle of cake comes out clean. Allow to cool in pan for 15 minutes, then turn cakes out on cooling rack to cool completely before filling and frosting.

Directions for filling:

  • In bowl of electric mixer, beat until stiff: heavy cream, confectioner's sugar and vanilla.
  • Gently fold in crushed oreos

Note - I cut each cake in half (with a cake torter from Michaels, for $2.99 it is worth every penny), put filling in the middles of each cake, then put filling in between the 2 cakes. 3 layers of filling total. Our class decorating project involved a clown, which I wasn't happy about, but the cake was delicious so the clown doesn't matter.


Sunday, March 30, 2008

Sugar Free Carrot Cake

For every family holiday gathering, my job is to make dessert. I'm the only one in my family who really enjoys baking, so it's a good fit. For Easter, I wanted to make something a little on the light side. When I found this carrot cake recipe at Splenda.com, I knew I had to give it a try. Carrot cake is one of my mother's favorite desserts. I have to say this lighter version was great. It was really moist, and since I upped the spices a bit from the original recipe, it had lots of flavor. I made a frosting with 8 ounces of fat free cream cheese, 1/3 cup splenda, and a teaspoon of vanilla extract. I would not reccommend using fat free cream cheese, stick to light. The texture of the frosting was off using the fat free. Overall, though, the cake was great, and I would make it again if I was looking for a lighter dessert.


Sugar Free Carrot Cake
Source: Splenda.com

Ingredients:

  • 7/8 cup all purpose flour
  • 1 teaspoon baking powder
  • 1/2 teaspoon baking soda
  • 1/2 teaspoon salt
  • 1/2 teaspoon cinnamon (I used 1 teaspoon)
  • 1/4 teaspoon ground allspice (I used 1/2 teaspoon)
  • 1/2 teaspoon ground nutmeg (my addition to the original recipe)
  • 2 large egg whites
  • 1/4 cup eggbeaters
  • 3/8 cup splenda
  • 3 tablespoons reduced fat margarine
  • 1/2 cup honey
  • 1 teaspoon vanilla extract
  • 3 tablespoons unsweetened apple sauce
  • 3 tablespoons canola oil
  • 2 1/4 cup finely shredded carrot
  • 1/3 cup walnuts
  • 1/2 cup golden raisins (my addition to the original recipe)

Directions:

  • Preheat oven to 350 degrees. In medium bowl whisk together flour, baking powder, baking soda, salt, cinnamon, allspice and nutmeg. Set aside.
  • In small bowl whisk together egg whites and eggbeaters. Set aside.
  • In large bowl beat SPLENDA® Granulated Sweetener, margarine, honey, vanilla, applesauce, and canola oil. Mix in egg mixture, stir until well mixed. Stir in flour mixture, then carrots, walnuts, and raisins.
  • Pour into greased 8 cup loaf pan and bake for 40-45 minutes, or until toothpick inserted comes out clean. Allow to cool, ice if desired. (I used 2 round pans, and baked for 30 minutes).


St. Patrick's Day, Part 2

We had a potluck at work for St. Patrick's Day, so I brought the pistachio cake, but I also decided to make some Oreo Truffles decorated for the holiday. Both were a big hit!


Pistachio Cake

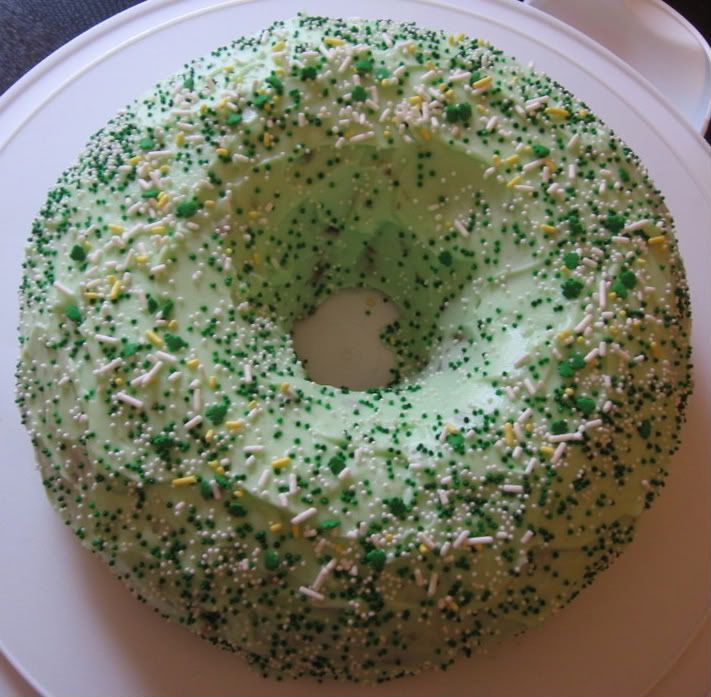
This is my absolute favorite cake. Of course, it's my mom's recipe, so it has to be good! This is the most moist, delicious cake you'll ever eat. And it's super easy to make too. I wish I had been able to get a picture of the inside of the cake to show how moist it is, and it looks really pretty sliced because the cake is cut in half with a layer of frosting in the middle. I made this for St. Patrick's Day, but I usually make it for Christmas too, and decorate it like a wreath.


Mom's Pistachio Cake

Ingredients for Cake:
  • 1 package yellow cake mix
  • 1 package instant pistachio pudding
  • 3 eggs
  • 1 cup club soda
  • 1 cup oil

Ingredients for Frosting:

  • 1 1/2 cups cold milk
  • 1 package instant pistachio pudding
  • 1 envelope dream whip

Directions:

  • Preheat oven to 350°
  • Mix all cake ingredients together, mixing on medium speed for 2 minutes
  • Pour into greased and floured bundt pan
  • Bake for 50 minutes
  • Cool in pan for 15 minutes
  • Turn onto rack and cool completely
  • Blend all frosting ingredients with an electric mixer and beat until thickened, about 5 minutes (I usually chill the bowl and beaters in the freezer while the cake is cooling to help the frosting thicken quickly)
  • Cut the cake into 2 layers, frost in between layers, then reassamble the cake and frost the outside
  • Keep cake refrigerated

Sunday, February 24, 2008

Oreo Truffles - all dressed up for Valentine's Day

One of my favorite things about baking is sharing treats with my friends and family. Since I've had a lot of time on my hands recently, I decided to make some little Valentine's Day gifts. I had made these truffles for Christmas, and they were a huge hit, so I figured that I would dress them up for Valentine's Day and gift them as gifts. They turned out super cute, and were delicious as always!


Oreo Truffles
Adapted from Recipezaar

Ingredients:
  • 1 pound oreo cookies
  • 8 ounces cream cheese, room temperature
  • ½ teaspoon vanilla extract
  • 1 pound milk chocolate
  • ½ pound white chocolate (I used red candy melts for V-day)

Directions:

  • Using food processor, grind cookies to fine powder
  • With a mixer, blend cookie powder, cream cheese and vanilla extract until thoroughly mixed (there should be no white traces of cream cheese)
  • Roll into small balls and place on a cookie sheet lined with wax paper
  • Insert toothpick into middle of each ball
  • Freeze until firm
  • Dip balls into melted chocolate
  • Remove toothpicks
  • Drizzle with melted white chocolate